
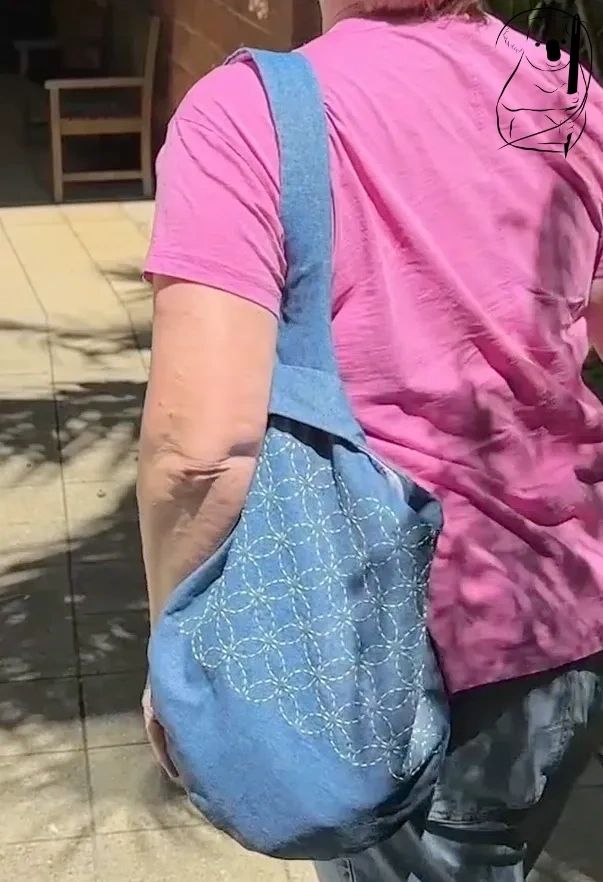
Here we follow on from our video Using A Sashiko Template. We take the finished Sashiko pattern which was stitched onto one side of our knot bag and make a lined knot bag with an inside zipper pocket.
The fabric chosen for this piece was a light weight denim with a light cotton fabric for the lining. The pattern on the lining fabric is pink blossom flowers reminiscent of cherry blossom. This is keeping in line with the Japanese theme of the project.
The shoulder strap is long enough to be comfortably carried over the shoulder and the bag is big enough to carry a reasonable quantity of personal items.
I like the style of the knot bag, as when it is carried, the bag it is self closing. The two straps tighten against each other preventing items from being too exposed to view.
The internal pocket was incorporated into the design at the request of a dear friend who wanted the extra security of an enclosed compartment for additional peace of mind.
The pocket added an extra dimension to the bag, as well as extra time and effort. In fact I would say that the pocket doubled the amount of time and effort put into the bag's construction. So if you want to simplify your own bag, omit the pocket and completion of your bag will quicken significantly.
In this regard, this type of pocket was a first for me. I found the method easy enough to work through and the results were very good. The experience alone was well worth the effort and next time I try a zipper pocket, I will have a lot more confidence to carry out the work.
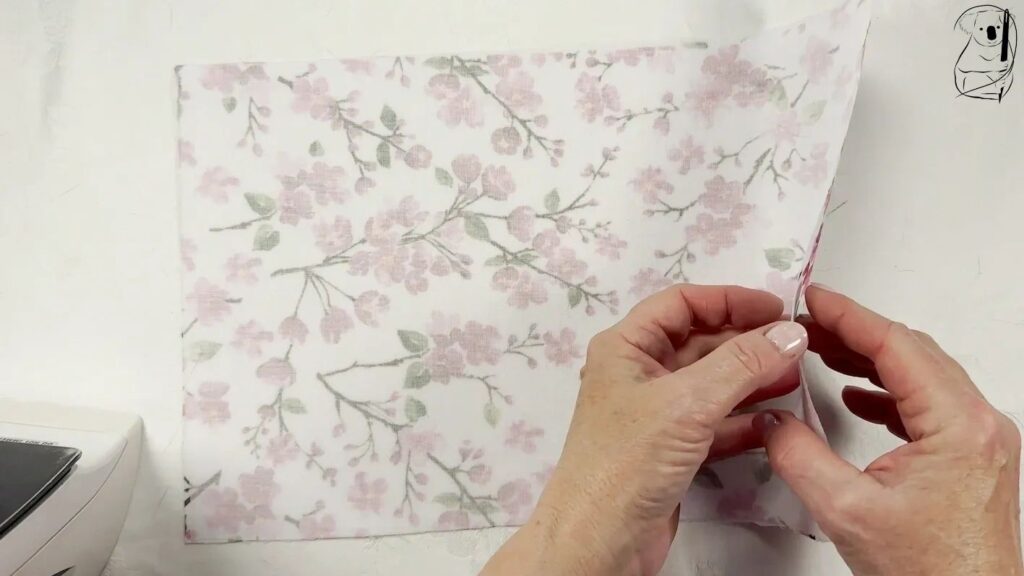
To begin construction of the bag I firstly cut out the front and back of the bag (each side is identical) in both the denim and cotton lining. With a remnant of the cotton I cut a rectangle of lining for the pocket 23.5cm by 36cm.
With a rectangle of iron on interfacing the same size as the cotton remnant, I ironed the interfacing to the wrong side of the pocket. The centre of the pocket was found by folding the pocket piece length wise and marking with a pencil.
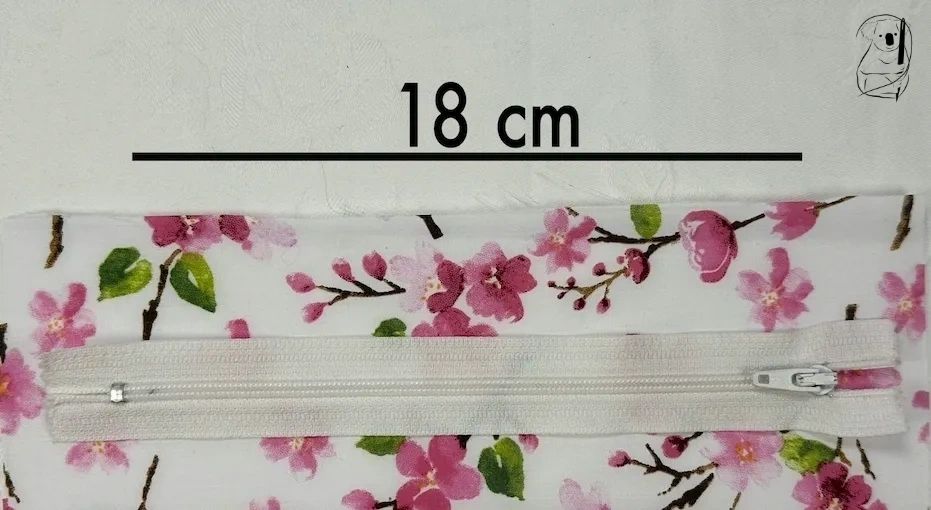
The zipper above measures 18 cm from one metal stopper to the other metal stopper. You can always shorten a longer zipper by stitching across the zipper at the 18 cm length.
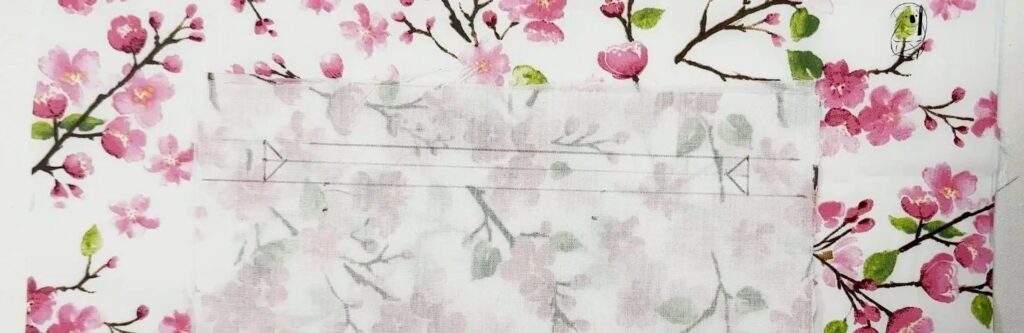
Watching the video you will see how the box above was constructed.
I measured 2.5cm from the top of the pocket edge and drew a line across the top of the pocket piece.
Measure down a further 1.5cm from your line and draw a parallel line across the pocket piece.
From the outer edge of the pocket piece, measure in 2.5 cm on both sides and mark these points .
Draw a rectangle by marking a vertical line to join these points.
Along the small vertical lines, mark halfway at about 8mm.
Connect these two points to divide the rectangle in half.
Along that halfway line, measure in towards the middle of the fabric 8mm on both sides and mark.
Draw lines at 45 degrees to form little triangles at each end of the rectangle.
I draw all my lines in pen ink as it was a clear fine line. The ink is permanent but it will all be hidden by the zipper.
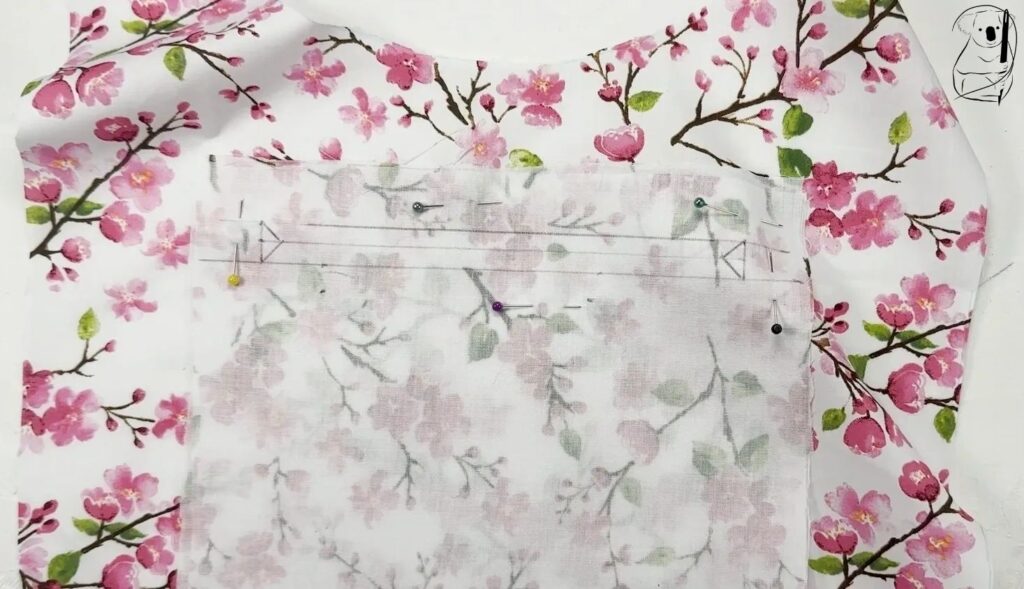
Lay your pocket piece on the fabric of your lining fabric, right sides together. Find the centre of the bag lining by measuring across the fabric and dividing by 2. You should have already marked the centre of your pocket fabric. Match up the 2 centre lines.
The pocket should not sit too high on the lining. You need to make room for the seam allowance and then provide an additional couple of centimeters or an inch to leave a gap from the bag opening. The pocket should not be set too low on the lining either as the bottom of the pocket could then bunch up on the bottom of the bag adding bulk and weight to the bag bottom and cause the bag to bulge at the bottom. Fold the pocket in half to check where the bottom of the pocket will sit.
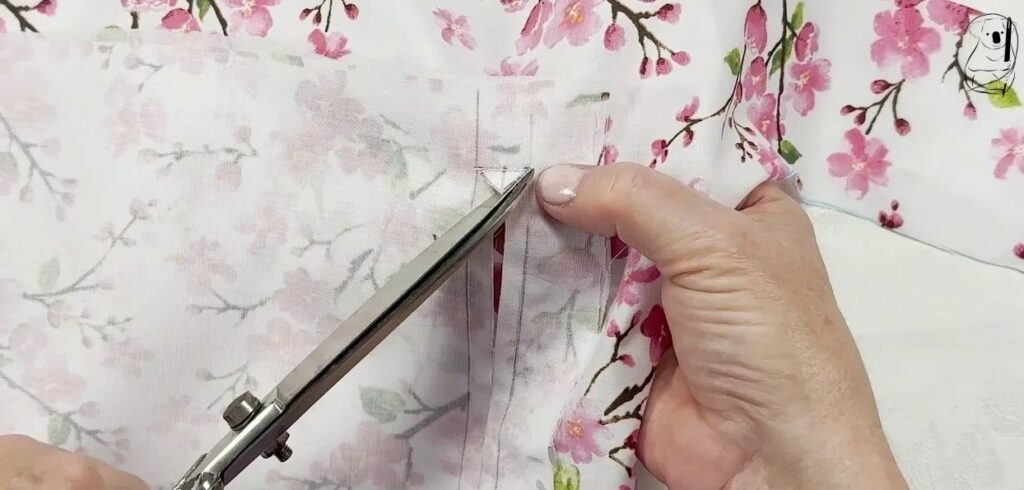
When you have decided where to place the pocket, stitch around the rectangle with your sewing machine to attach the lining fabric to the pocket fabric. Once you have secured the fabric around the box with stitching, you need to cut along the centre line.
Fold the fabric in half as shown in the video and make a small cut at the mid point of your centre line. Open out the fabric flat, then cut along the centre line to the tip of the triangles at each end.
Cut down the sides of the triangles to the rectangle corners without cutting your stitching.
Sharp scissors will help you get into the corners and cut with accuracy.
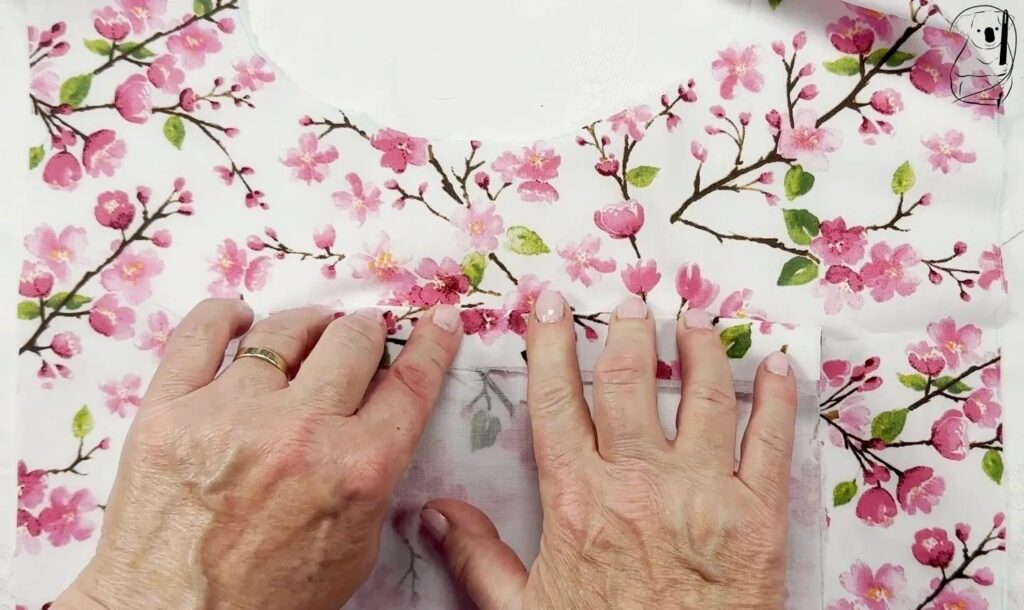
When the centre line has been cut, fold back the flaps on the top and bottom of the opening and stitch them down through the layers of fabric.
Once stitched, work the pocket fabric through the zipper opening and massage in place. Ironing of the opening will help it sit flat and stay in place.
I pinned the zipper in place and opened and closed the zipper a few times to make sure it worked properly and the fit was good.
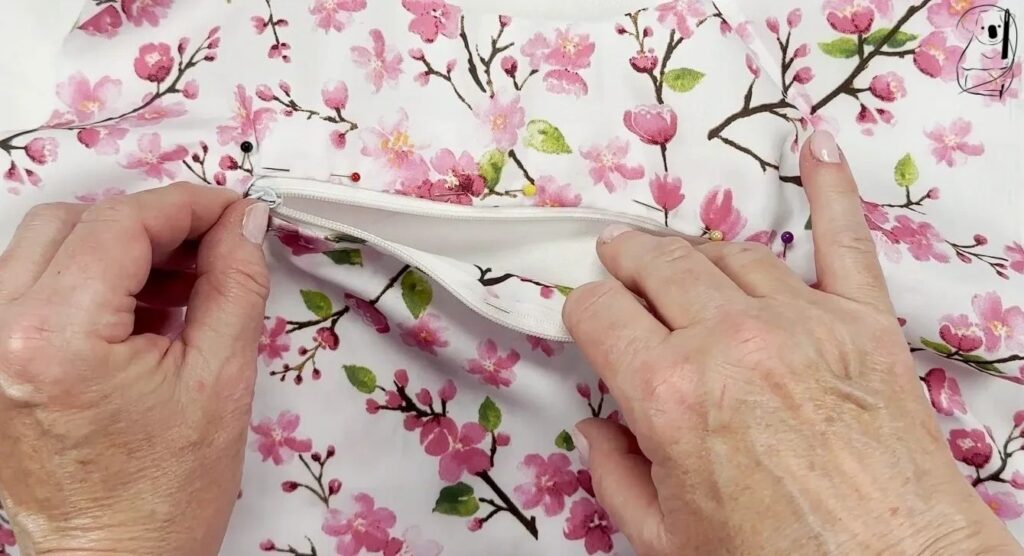
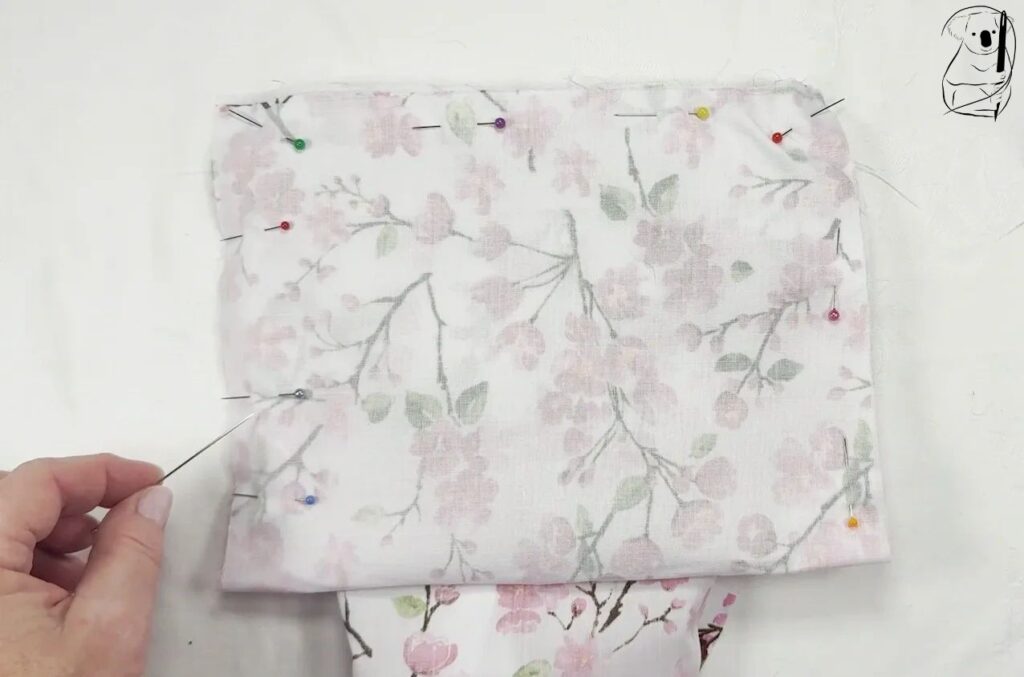
With a zipper foot on you sewing machine, stitch the zipper in place to secure it and press the fabric again.
To form the pocket, fold the pocket piece in half and pin the 3 open sides. To keep the lining fabric away from your stitching, fold it underneath the pocket fabric so it doesn't lie under your seam allowance.
Stitch the 3 sides with your sewing machine.
I ironed the bottom of the pocket, This may reduce bulk and help the pocket to sit flat inside your bag.
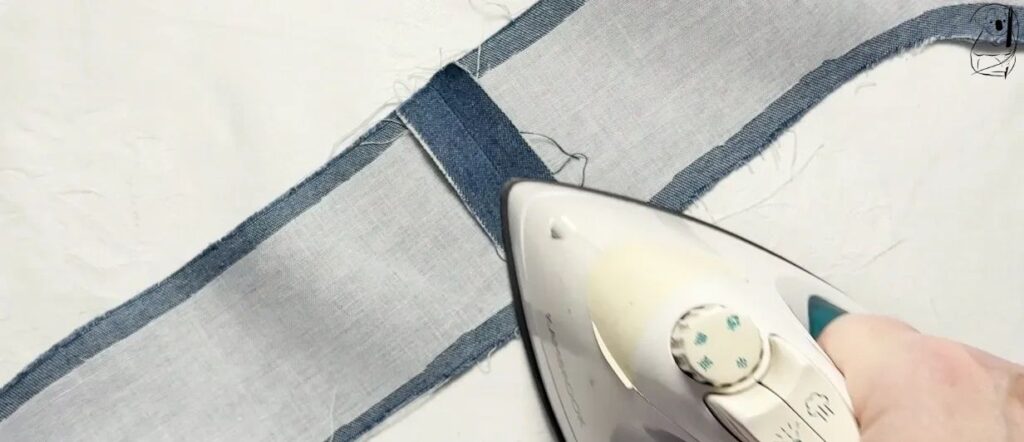
Now we start the construction of the bag itself.
Firstly I added iron on interfacing to the denim to add body, support, and weight to the fabric.
Then with both the bag lining and the denim outer bag, pin the shoulder seams together - both the long strap and the short strap.
Press your seams with an iron as you move through the construction process. It will improve the look of the finished product and can make your construction work easier.
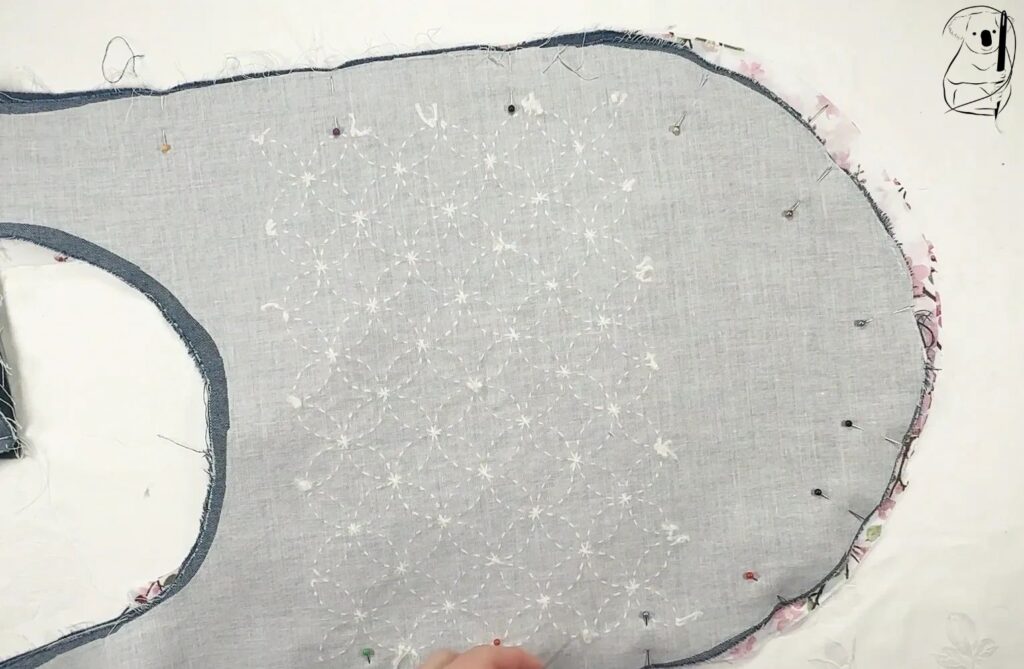
For both the lining and the bag itself, pin and stitch part of the outer edge of the pieces.
If you refer to the image here, the stitching starts level with the bottom of the curve where the bag opening sits and finishes at the same level on the other side. Having some space here will give you access later on to pull the bag right side out.
When the stitching has been completed, cut the fabric around the outer edge of the seams so that the curve will sit flat and will not buckle or pucker. Again press with an iron to flatten out the seam on the right side of the fabric.
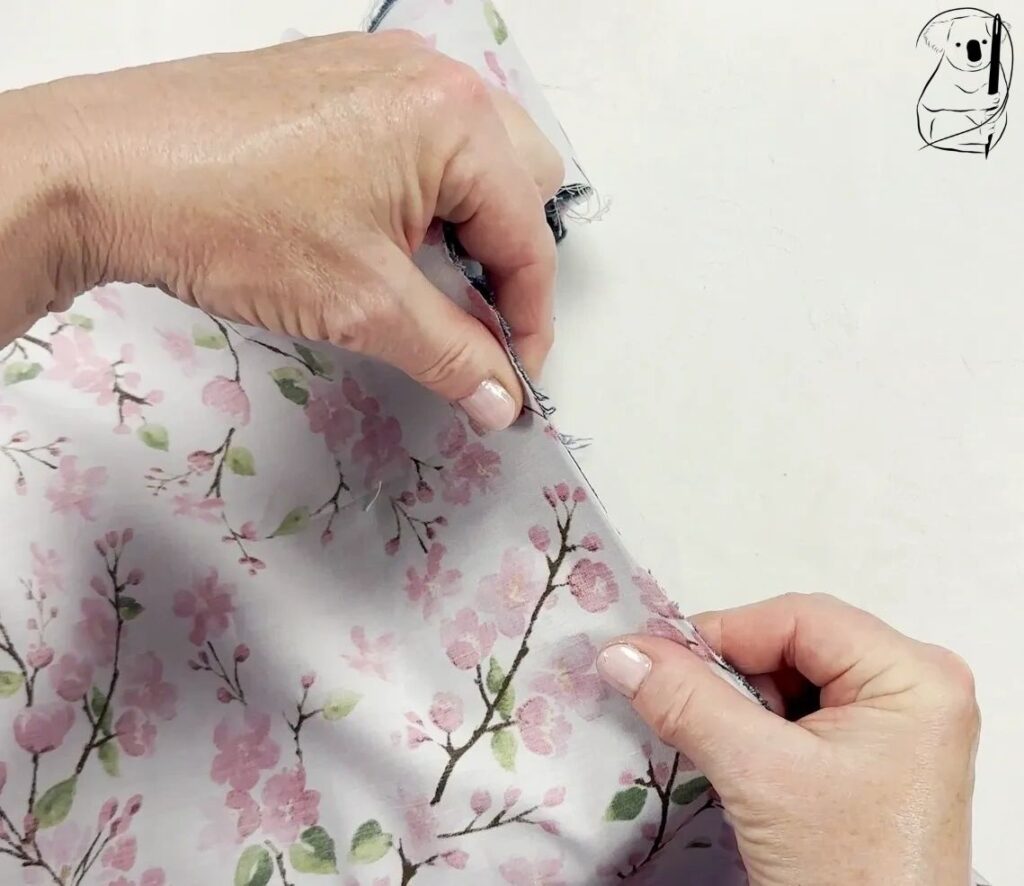
Now we will stitch the lining to the denim around the bag opening. Matching the right sides together, pin and sew the lining and denim together all around the bag opening from the curve at the bottom, up the long shoulder strap, down the back of that strap to the other curve at the bottom and up and down the short strap.
The lining will be sitting outside the denim bag.
After sewing around the opening with your machine, clip the curves with your scissors to ensure they sit flat when the bag is turned right side out.
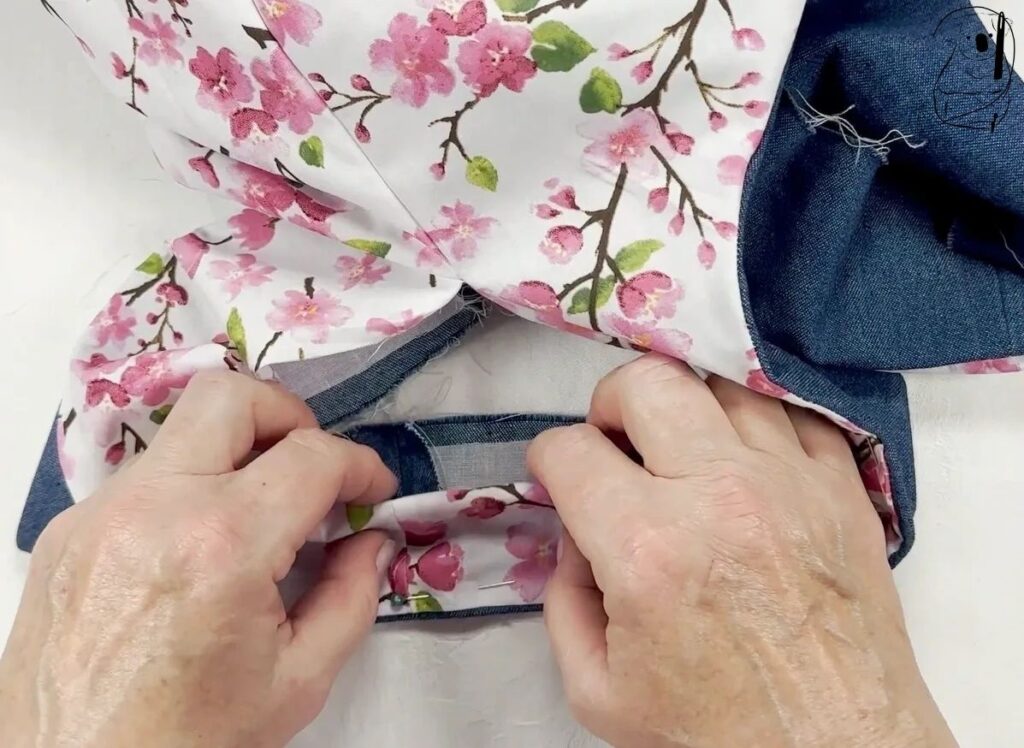
Now it is time to turn the bag right side out. Using the small gap which remains unstitched, gently pull out the fabric from the inside. When the bag sits right side out, press the seams and edges with an iron.
The inner seam of the straps have been stitched already and all that's left to complete the bag is stitch the outer edge of the straps. I did this by hand, however you may choose to do this with your sewing machine.
Fold the edges over to approximate a seam allowance, and press the fabric to hold the folds in place. I also pressed the inner seam which had already been stitched. I pinned the inner edge to hold the seam in place then took the pressed lining and denim from the outer edge and pinned them for hand stitching. Using Whip Stitch, the edge is secured neatly and almost invisibly.
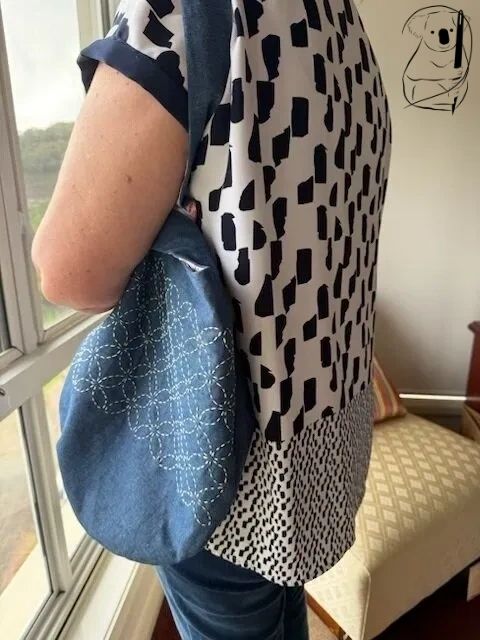
Over the years I have made quite a few of these bags. They are quick and simple, can hold quite a few items and will squash up for packing if you want to travel with it.
My big mistake in making this bag was not washing my denim before I embroidered it. I was a shocked by the amount of dye that came out of the fabric. Washing also softened the denim and made it lose some body. I overcame this by using interfacing to add body to the fabric. You can choose to use a wide variety of fabrics for this bag from canvas, furnishing fabrics like tapestries or velours or even patchwork fabric that you make yourself.
I have also made this bag in a smaller hand purse version which has proven to be greatly appreciated by friends and family.
As mentioned, the addition of the pocket added a lot of time to this project however I think pockets are incredibly useful and it was well worth the effort.
Now the process of putting in a zipper pocket has been completed, the next pocket will be a much smoother process.
See the video of the bag being assembled.
Watch the video of the design being applied to the fabric.