
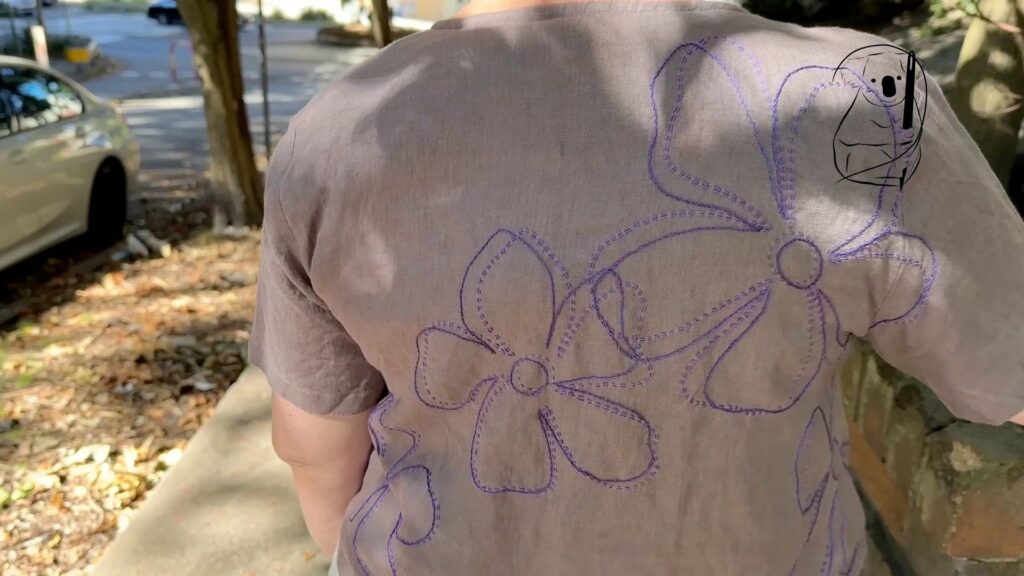
Here we have a further exploration of the Sashiko world. I am combining purple Olympus Sashiko thread, and Embroidery thread in a single motif. And we are using both Sashiko Stitches and Stem Stitch, forming the 2 in a pattern reminiscent of a magnolia flower.
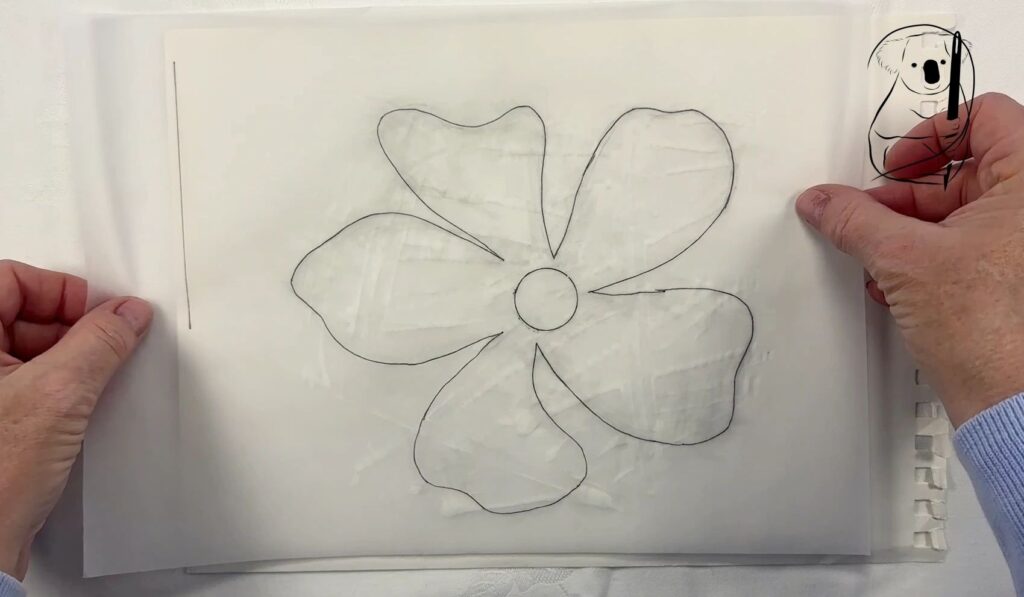
The pattern is available for free in our Resources Section. I traced the pattern onto some tracing paper then used craft glue to paste it onto a thick sheet of paper from a sketching pad. This makes it much easier to trace around the design with the marker pens directly onto the fabric.
Make sure you have 2 marker pens for this project. We are tracing 2 flower outlines for each motif. You can see in the video that I turned the motif slightly anticlockwise from the centre, then moved the whole pattern to the left slightly.
Don't move the pattern too far or you will lose the cohesion of the flower shape.
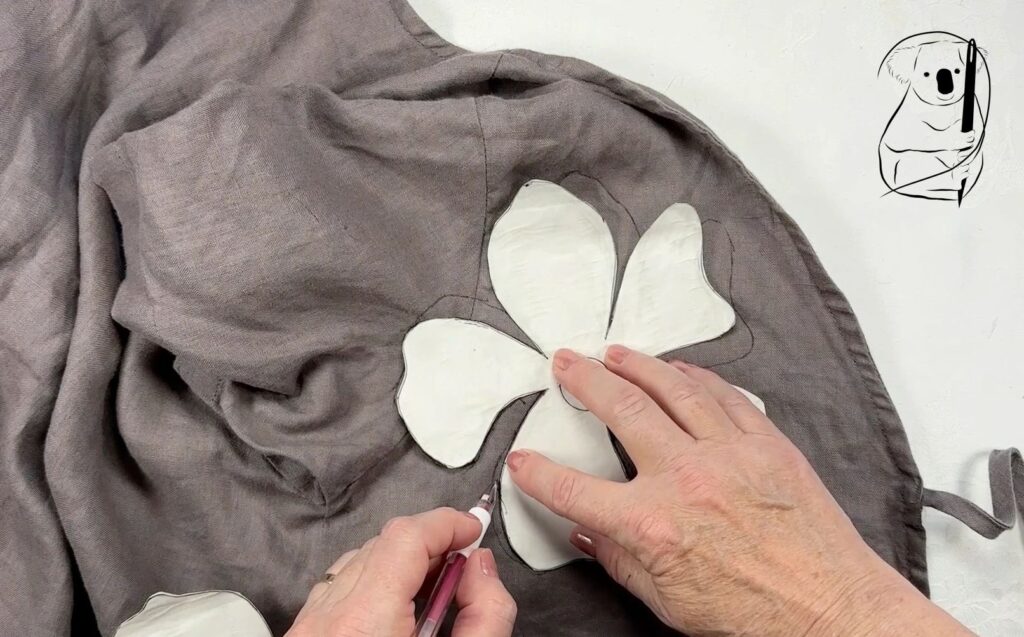
You can see in the video, I used black and red marker pens. If you have only one colour of marker pen it is very easy to lose track of the line you should be following.
My marker pens here were excellent for the purpose. The colour runs smoothly and thickly enough to mark the line clearly. These pens are quite cheap however you do use up the ink quite quickly. They come in packs of about 40 pens, in blue, black, red and white. This seems like a lot of pens to buy, but I did use up about 1/2 of my 2 pens for this project.
When placing the motifs, I moved away from our Project - Layla, where the pattern is densely packed and uniform across the garment. Here the flowers drift across the garment with only 2 flowers actually intersecting. There are 2 sizes of flowers in this pattern. Choose your size, placement, and number of motifs. A single motif on the front of a garment will still look very effective and be a real feature to catch the eye.
The first row of Sashiko stitching is simple - just follow the lines. Keep the stitches uniform and watch the tension. After you pull the thread through the fabric, smooth out the stitching by running your finger along the stitch line a few times to ensure the fabric sits flat. At the corners leave a little extra thread at the back of the fabric. You will see this demonstrated clearly in our video Sashiko -Beginning A New Journey. For this first row of Sashiko stitching do not take the stitching too close to the circle at the centre of the motif. Your second row of Sashiko will need to fit into that space.
My personal choice was to commence each flower at the centre circle. Remember that with curves like this, you won't be able to fit as many stitches on your needle as is possible on the straight lines of this pattern.
At the back of the work is used a Quilter's Knot to finish off the thread.
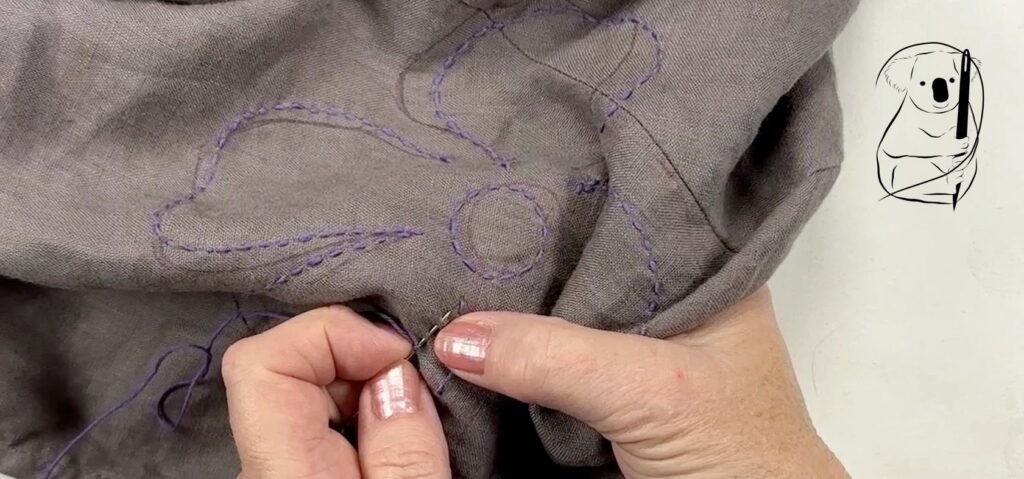
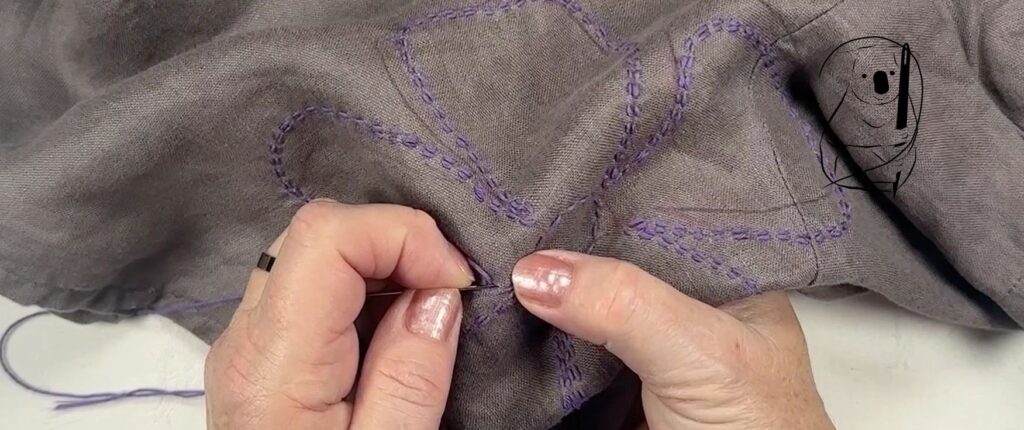
You can see in the image above, the second line of Sashiko stitching follows the first. I tried to match this line of stitching to the first row, keeping the 2 rows close together as well.
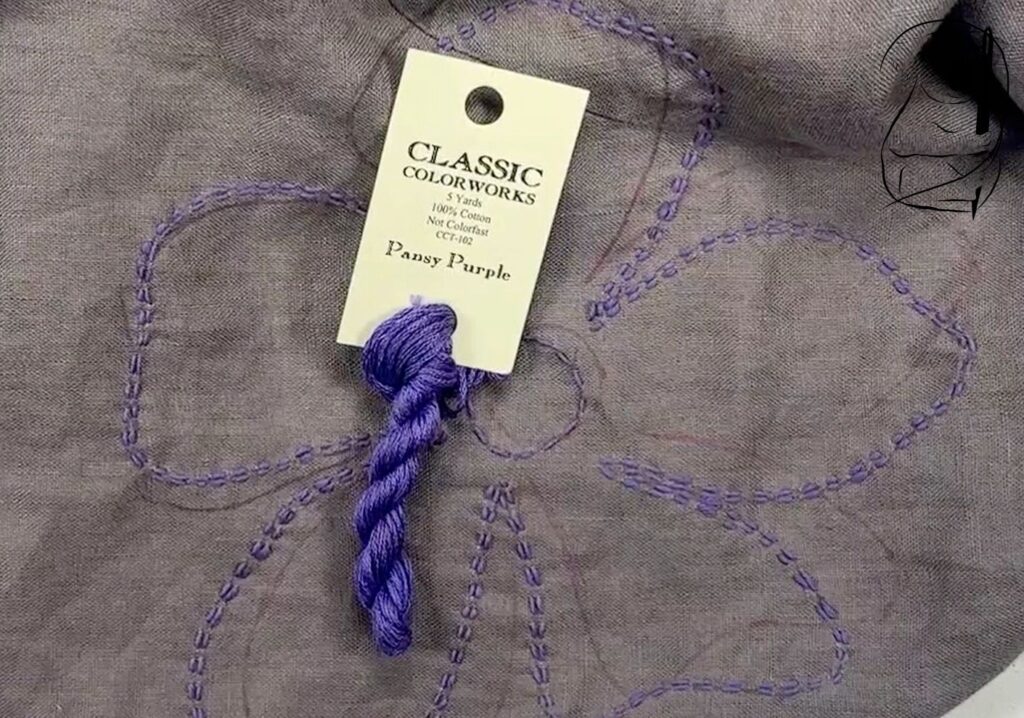
The Stem Stitch for this project was done using the Classic Colorworks hand dyed embroidery thread. I couldn't find a purple thread to closely match the colour of the Sashiko thread in the DMC range. The Classic Colorworks thread was a pretty close match and the colour here is very rich and deep.
Be warned - this is labelled as non colourfast. Unfortunately I didn't read the fine print when purchasing the thread. I did wash a section of the garment in warm water with no apparent loss of colour. I was advised that some colours are more prone to losing their dye than others - red and yellow being well known culprits. If you purchase hand dyed thread, then this may always be a consideration to factor into your choices.
I chose purple for this project as the garment fabric has purple tones in it and I hoped the embroidery would bring out those tones in the finished work. I think it achieves that, however I will be hand washing this garment in the future to ensure that any colour loss is kept to a minimum.
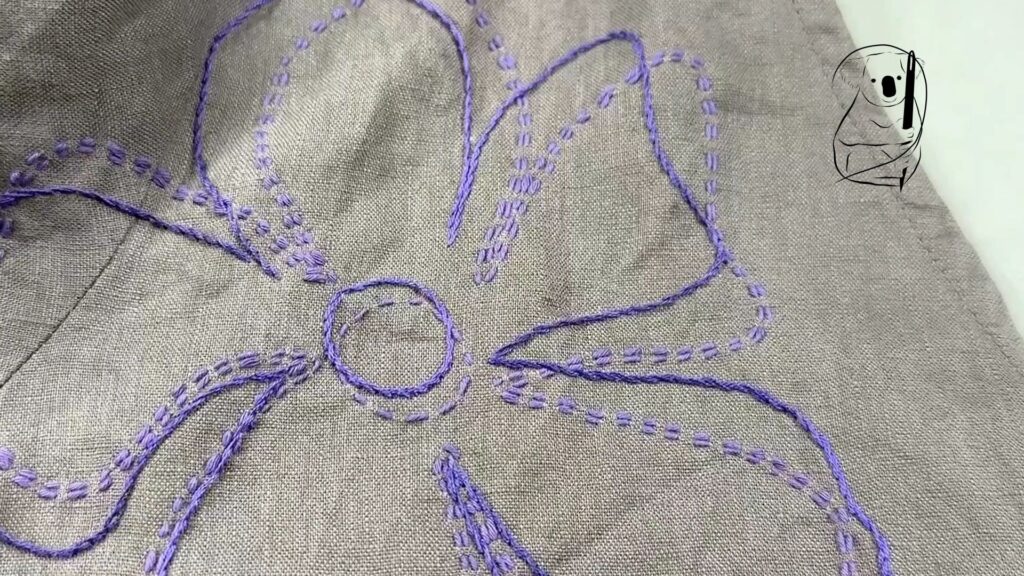
You can see the rich colour of the Stem Stitch in the above image.Not only does the colour pop, but the raised nature of Stem Stitch gives the motif a lot more texture. The stitch itself shows the twist of the Stem Stitch and the raised nature of the stitch actually casts a bit of a shadow onto the fabric.
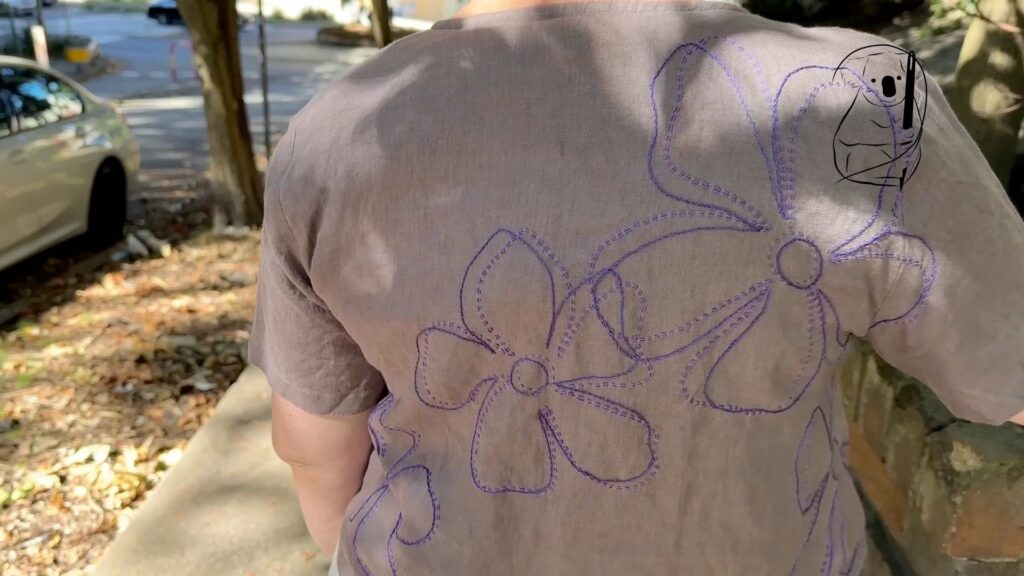
I love the result here. By choosing how many flowers to place on the garment, you can determine how long you want to spend on this project. Have a single flower, or several. The look here is relaxed and flowing. And following my method for creating the pattern, you can design your own pattern to suit personal taste.
I only spent 3 or 4 days working up this project, and the flowers have taken a drab coloured garment to be something much more interesting.
The Classic Colorworks threads were priced at $4.60 at my local shop, and can be found at http://classiccolorworks.com/home.html
The Olympus Sashiko thread was priced at $21.96 on Amazon. You can find it here, https://amzn.to/4wQNTZC
The marker pens were $12.99 for 40 pens in 4 colours. you can find them at Amazon here. https://amzn.to/4dPhJoZ
This blog uses affiliate links for products we have used in this project. If you purchase one of these products we may receive a small commission at no additional cost to you. Our recommendations are based on personal experience and your experience of the products may differ.
Watch the project come together on YouTube