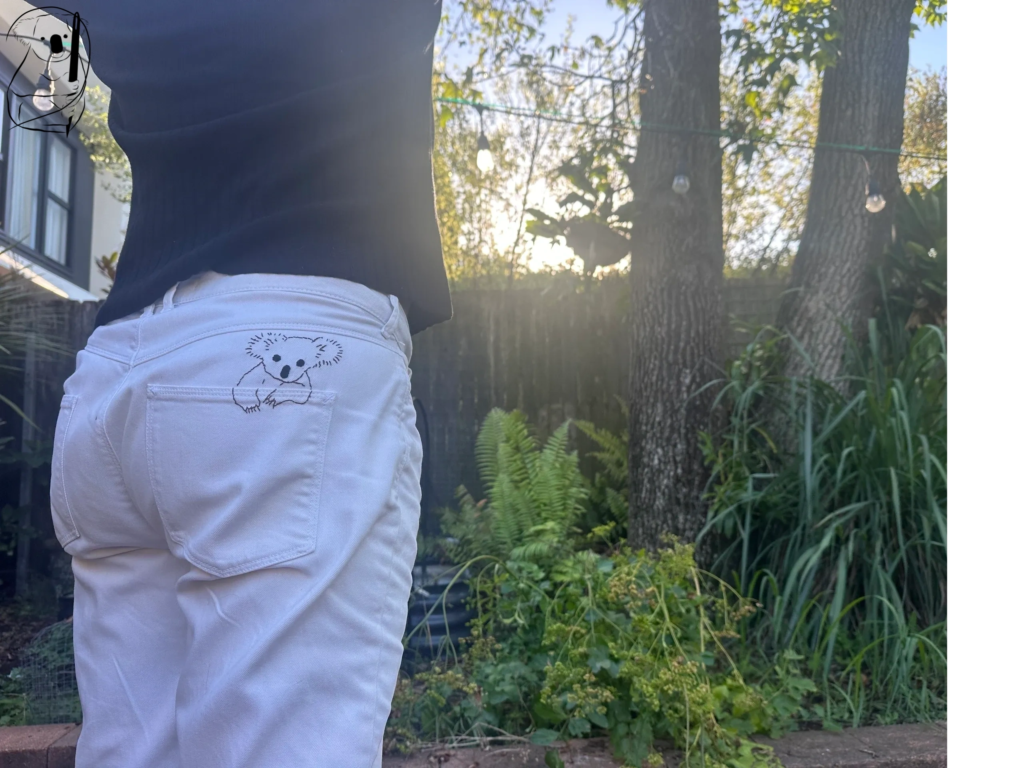
Courtney is the first in our pocket pals series. It is designed to be a small fun project to add a personal touch to an existing garment. I am placing the embroidery just above a pocket to give the impression that a koala is climbing out of the pocket itself. Here we have a Koala image with arms resting over the top of the pocket. I have selected a pair of cream jeans to work on.
A big consideration in selecting these jeans was the spacing between the top of the pocket and the seam of the back yoke. At its tallest, this space is 5.5 cm or about 2 inches. A lot of jeans have very little space here in which to work. I also thought that the cream colour would provide a good contrast to the colour of the threads used. After a bit of practice with different threads I chose a dark brown colour over the more accurate Koala grey. That colour simply contrasted poorly to the jeans.
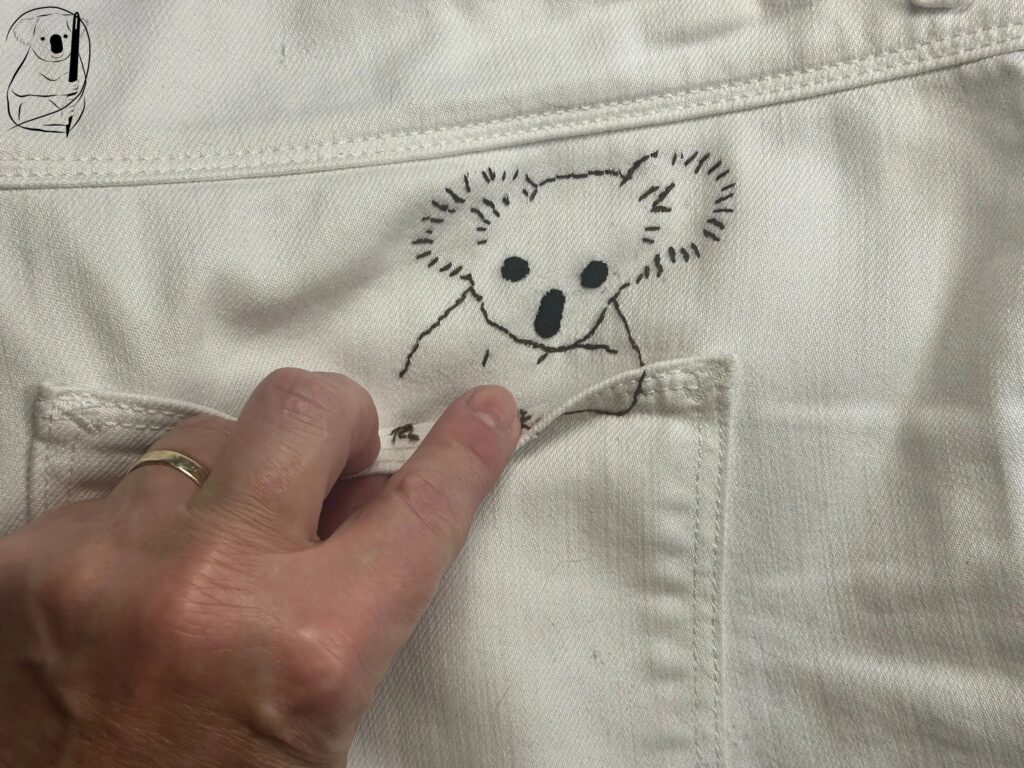
In order to transfer the pattern onto the jeans, I used a Hemline Wash Away stabiliser which can be drawn on with a marker pen and will dissolve in water when the garment is washed. When practicing with the wash away, I discovered just how easily it can dissolve. Condensation on my hands and summer perspiration quickly put a hole in the fabric. Lesson learned!
I traced the pattern of the Koala onto the wash away stabiliser using a fabric pen. The ink from the pen will also wash out and not permanently stain the fabric. Be sure to use an appropriate marker pen as there are several different types. Some will fade in the air, some disappear when wet and others take time to appear on the fabric. The pattern was then pinned to the jeans to hold it firmly in place.
Using 2 threads of dark brown DMC embroidery floss, I used back stitch to create the outline of the head and shoulders. Then I cut the wash away fabric across the pocket edge in order to embroider the arms and claws. In hindsight I should have cut the image at the start and treated the picture as two parts, though care would need to be taken to ensure that the two parts match up precisely. Once the head and shoulders were completed, I moved onto the arms and claws.
Once the body and arms were completed I back stitched around the outlines of the nose and eyes using 2 strands of black DMC thread. Satin stitch using the same black thread was used to complete the eyes and nose. This completed the embroidery.
To clean off the wash away, I hand washed the pocket area in cold soapy water for a few minutes massaging loose any stabiliser. Then the fabric was rinsed several times to remove any residue.
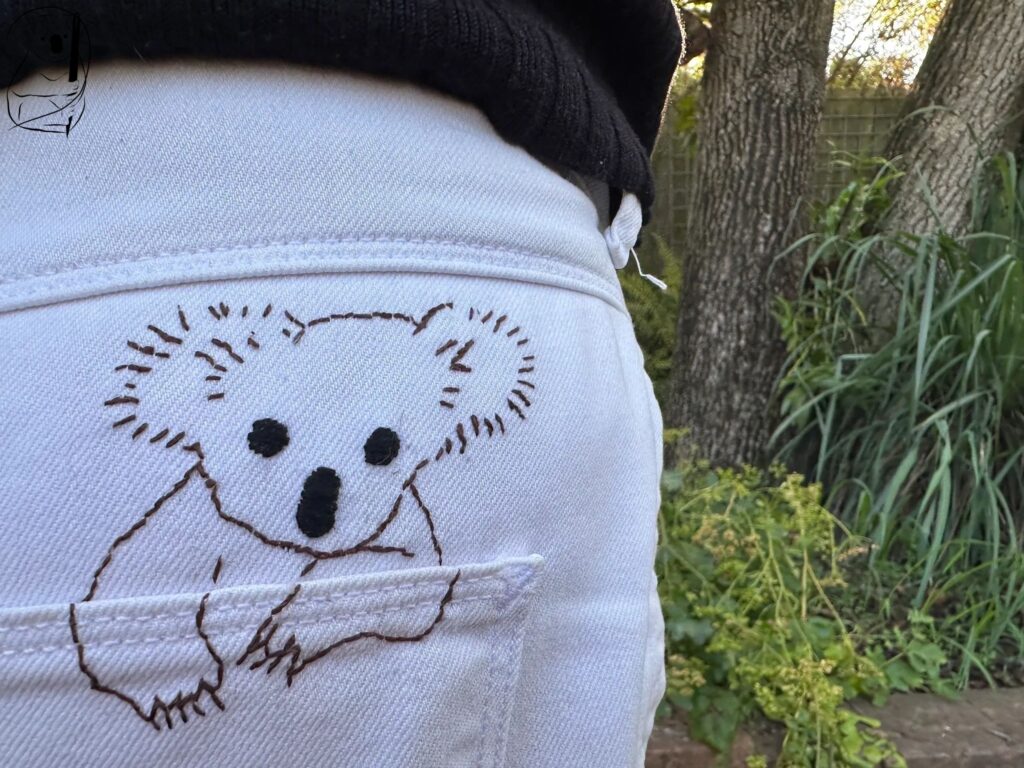
This project took about 3 hours to complete. I used dark brown and black DMC thread which I had on hand, a Sullivans Fabric Marking Pen, Hemline Wash Away fabric and pins. The jeans were thrifted for this project and I selected a style with maximum space in which to place the image. I think the results are excellent and the image gives the jeans a personal touch and talking point.
As a beginner, I learned a lot from the project regarding the marker pen and wash away which I hadn't used before. Again as with other denim projects, I found the seam work at the edge of the pocket pretty tough to work on, and this could be avoided by selecting a garment with a finer weave such as a shirt or dress pocket.
I also went back to the image and added some further stitching to extend below the top of the pocket. When the pocket was partially open it was very obvious where the pattern was interrupted.
We will be adding to our pocket pals images over time and they will be found in our Resources section of our website available for free.
See the video tutorial for Back Stitch here along with video of the making of Courtney.
See the web page for Back Stitch here.