
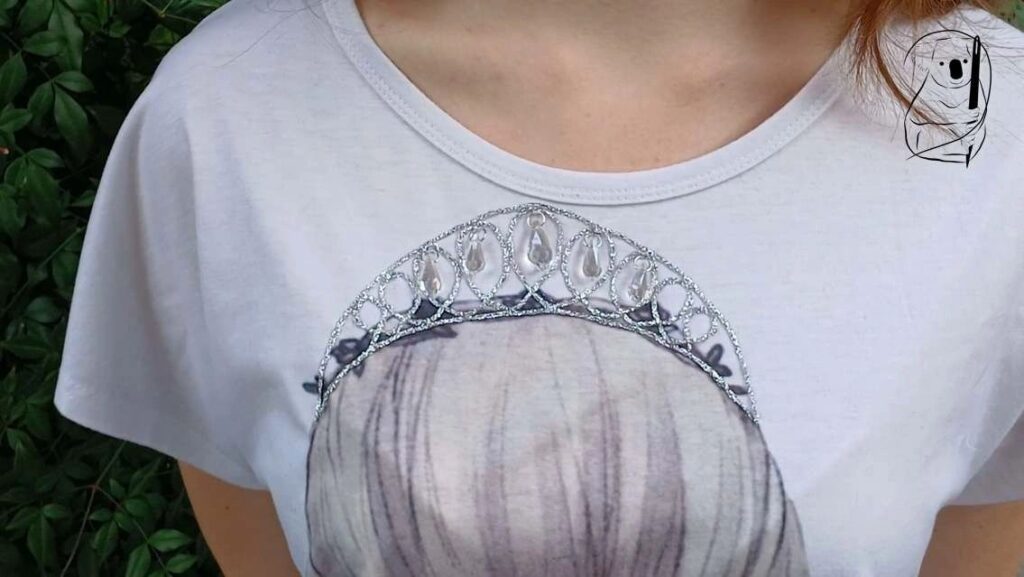
As soon as I saw this shirt, I knew what I wanted to do. Imagine my delight when I discovered that there is actually a Tiara Day - 25th May!
Inspiration can come from many directions. In this case, the picture on the top was leading the way.
A little research on tiaras, and we were set to stitch.
Because we are looking at the back of the head, the tiara needed to be of a design that could look the part both from the front or the back.
A simple frame with hanging jewels does this.
And the yarn was left over from a Christmas project. It is glittery, and flat, making it ideal to sew onto the surface of the top.
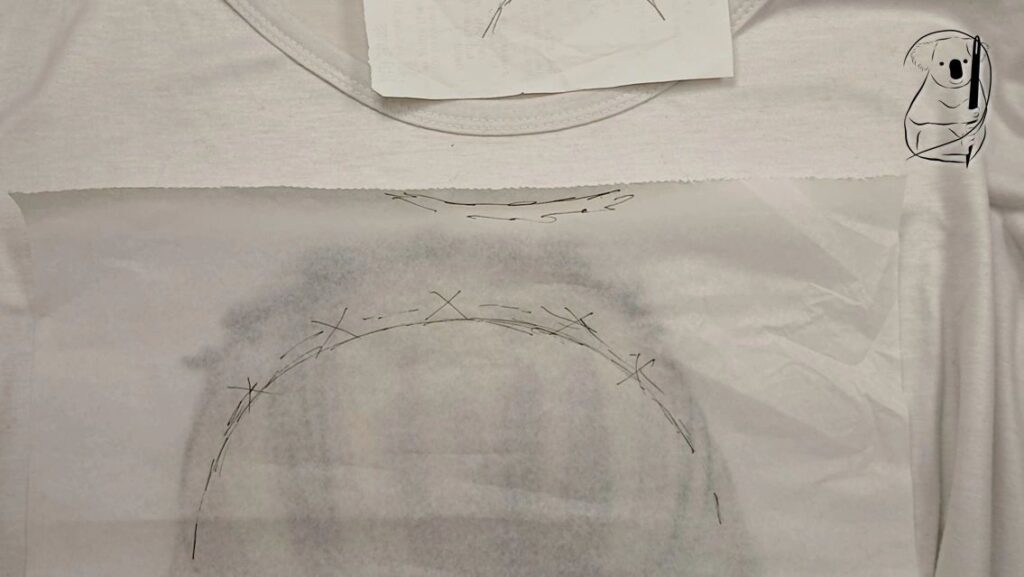
Working with an existing image, I based my design on the size of the printed head.
The head is slightly off centre, so the design will be too, so it is sitting centred on the head.
The existing headband design made it easier to sketch out the proportions of the tiara.
I found hanging crystal beads in two sizes. Neither packet (small has 4 beads, large has 3 beads) had enough for the drama I wanted, so I bought both. Using all the beads for the tiara seemed too much, but this lead to a happy craft moment at the end of the project.
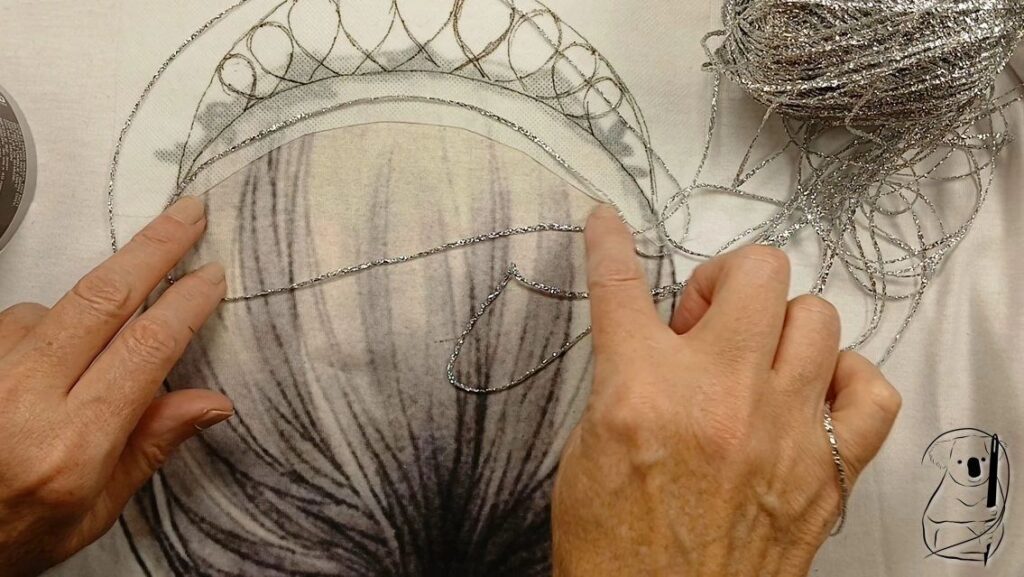
Before cutting the silver yarn, I mapped out how much I would need for first the frame, and then the loops.
The tiara design was drawn onto some sticky solvy, which has the added benefit of stabilising the fabric as you sew.
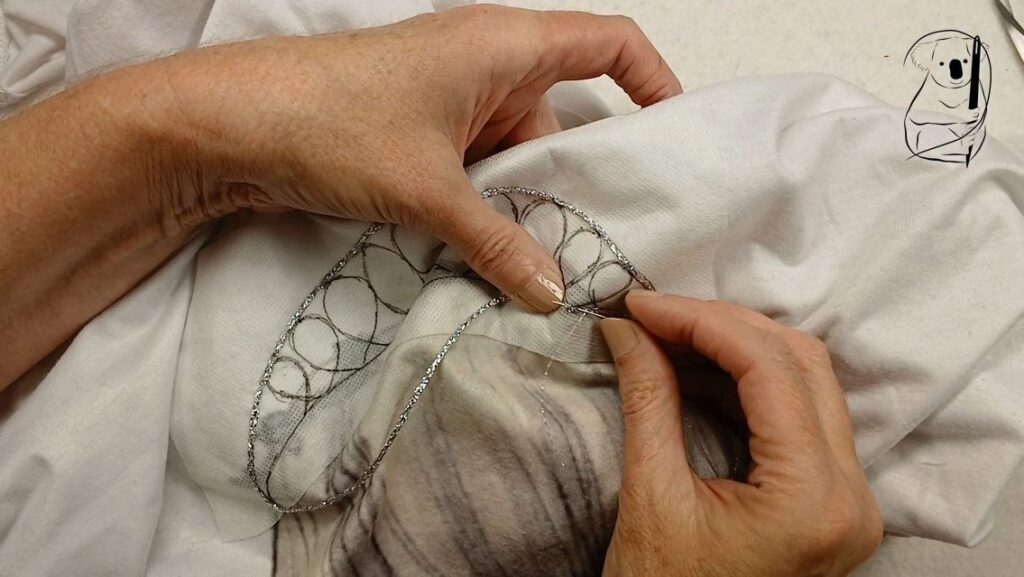
The stitching of of the silver yarn was done with running stitch and silver thread. The small running stitches disappear into the texture of the yarn, making them practically invisible.
This speeds up the project nicely.
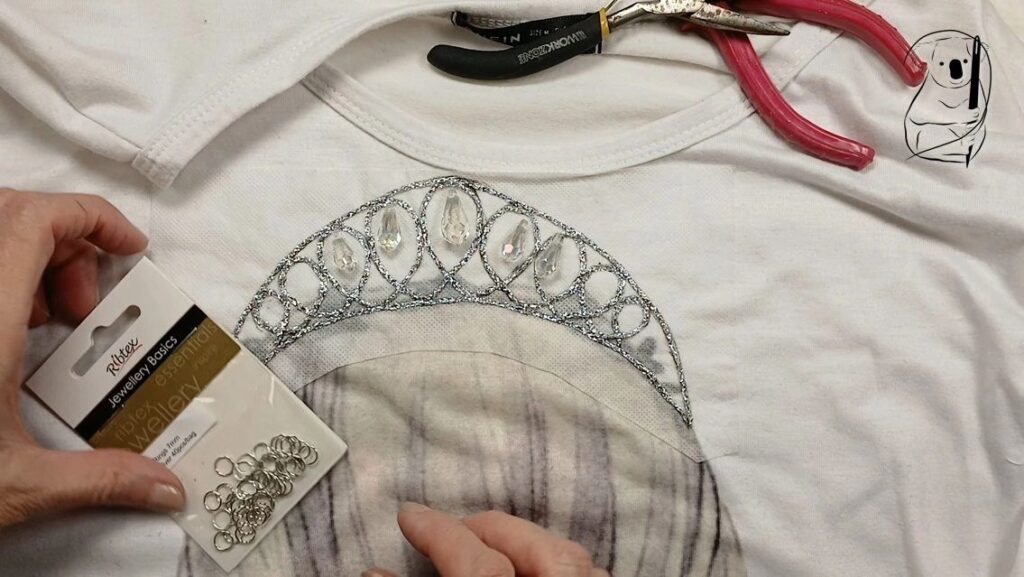
I wanted the beads to move freely on the surface of the top, to maximise their ability to catch the light, so rather than sewing them directly onto the fabric, I mounted them on jump rings first, then stitched those in place.
The movement gives just the effect I was after.
A note about care - this is definitely hand wash, or at the very least, use a good quality lingerie bag to protect the beads when washing.
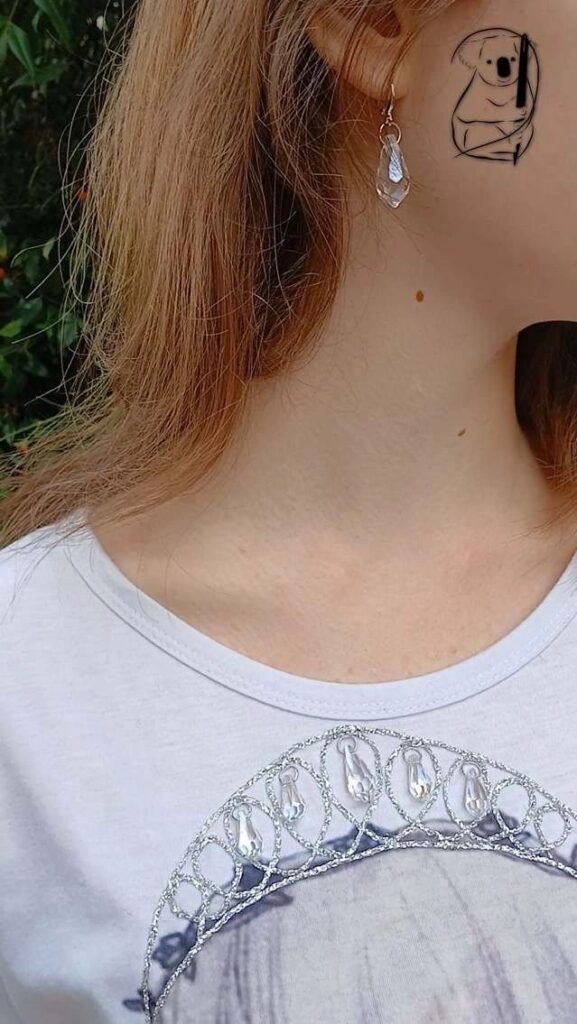
And the happy craft moment at the end?
With two beads left over from the "large" packet, I made a pair of matching earrings, so Tiara day is sparkle all the way.
This was a fun little project, built around a printed t-shirt.
So what do you do if you don't have a t-shirt with a head on it?
Well, for the next Tiara Day, we might start from scratch, and paint our own head onto the fabric. Stay tuned to see what we do.
Materials used in this project:
- printed t-shirt - purchased from a thrift shop.
- Milford Metallic yarn, 100% polyester in Silver - from stash
- Madeira Metallic thread, Colour 41 - from stash
- Crystal Brilliance Teardrop beads, clear AB 4 pack 16mm - $3.75
- Crystal Brilliance Teardrop beads, clear AB 3 pack 20mm - $3.75
- Ribtex jump rings, Silver - 7mm - $4.50
- Ribtex Huggie Hoop with Eye - $4.00
Watch the project come together on YouTube
Most of the expense for this project came from the beads and associated bits.
For a simpler project, the tiara would still be fabulous without the beads.