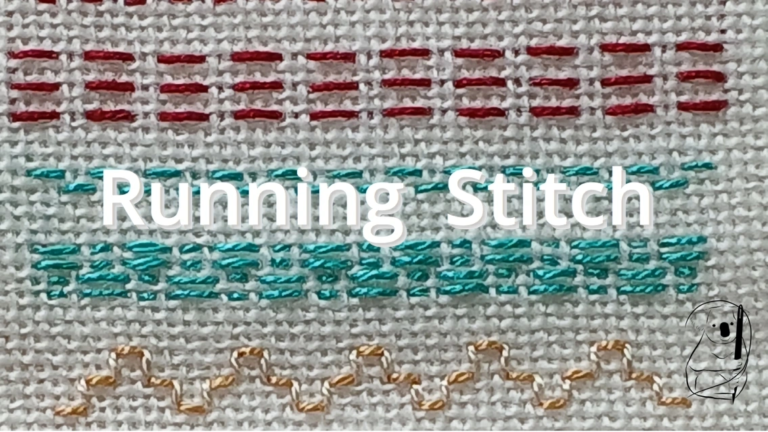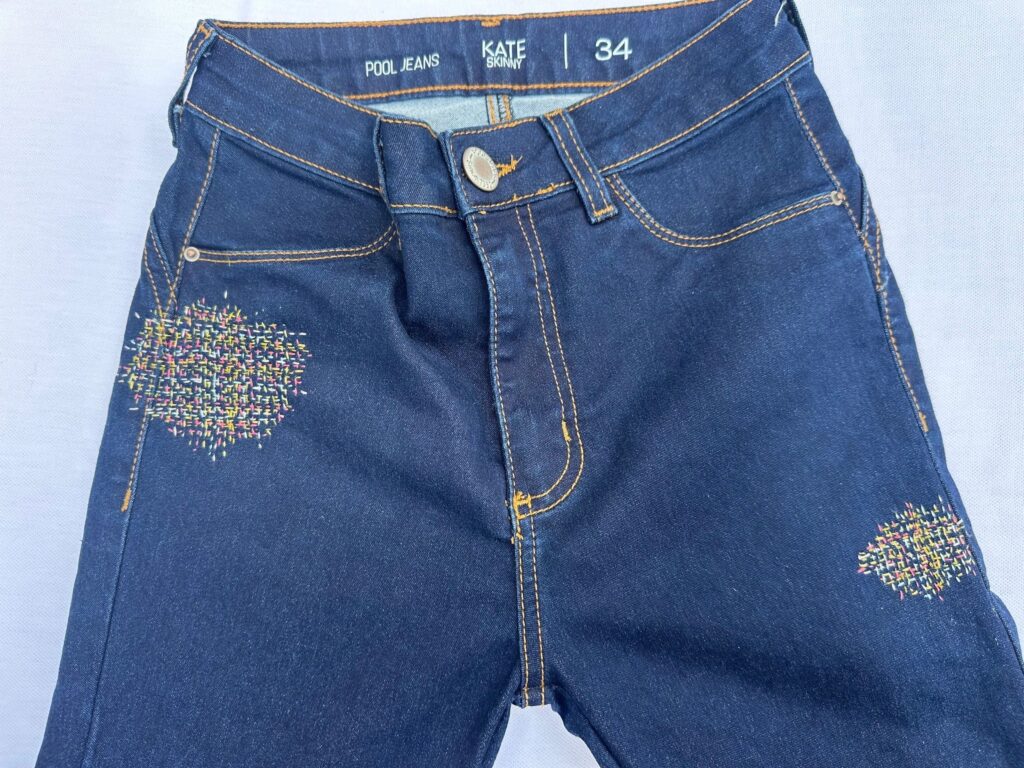
In this project we will be applying running stitch to upcycle girls jeans. I am going to form a grid pattern using 5 colours to decorate two sections of the jeans. The effect will be slightly rustic as freehand is not always precise and the curvature of the fabric is an added complication.
In planning this piece I have considered that the back pocket area will likely get more wear and tear than the front. So I will place a patch of embroidery under the front false pocket. Being a false pocket, there is less fabric to avoid at the back of the work.
A second, smaller patch of running stitch embroidery will be placed down the outside of the opposite leg to add balance to the overall effect. The fabric of the jeans is stretchy so I will need to ensure that the stitches are loose enough to allow for this stretch.
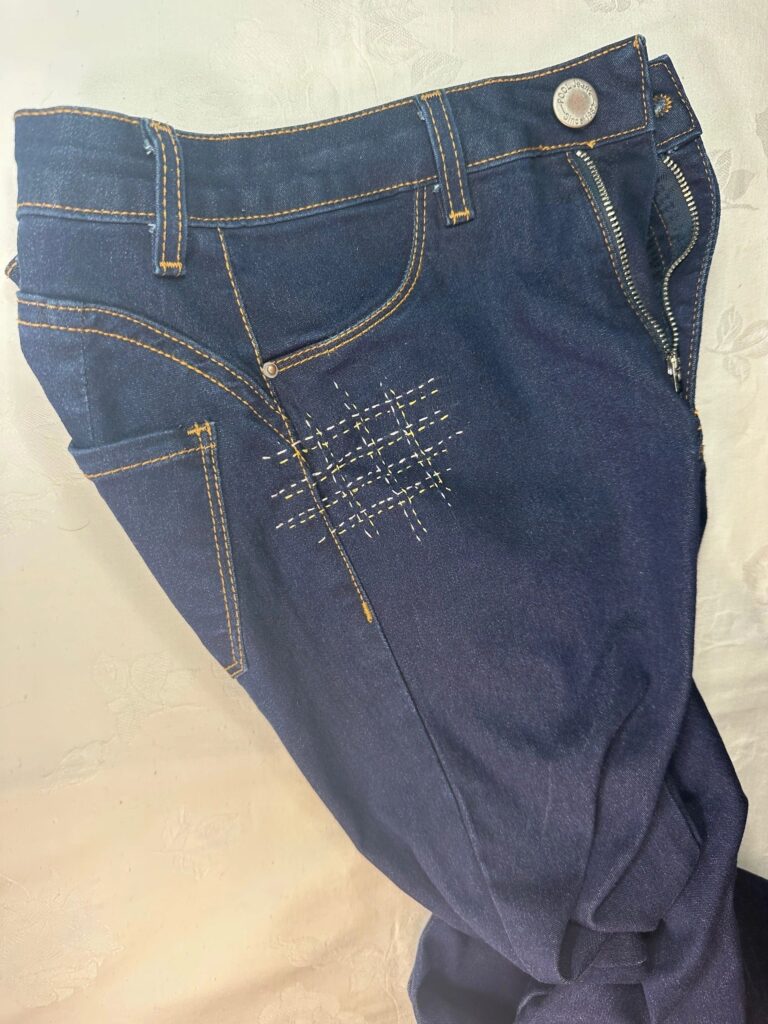
I used 2 strands of DMC thread in 5 different colours as a contrast to the dark denim. At the end of the project I decided to add a gold metallic thread as a highlight.
To begin, I used a ruler to draw lines in a grid pattern using a Birch "Chalk Wheel" applicator. The grid pattern should look straight and regular.
When I practiced this project, I tried to put the jeans in an embroidery hoop. The seams of the jeans made this difficult as the additional bulk of the seams was substantial. I found however that the the weight of the fabric and its thickness were enough to not require the support of a hoop. I discarded the hoop for the actual project. Though the fabric had some stretch, this was manageable and I pulled the work gently throughout the stitching process to accommodate the fabric's needs.
I stitched over the grid lines to form the basis of the pattern. Changing the thread to a second colour, freehand stitches were made following the first lines of stitching trying to keep the lines parallel. This was repeated, using each of the remaining colours to fill out the pattern. As the lines were freehand, they were not perfectly straight, however in the burst of colour of the finished product, this is not a distraction from the overall look.
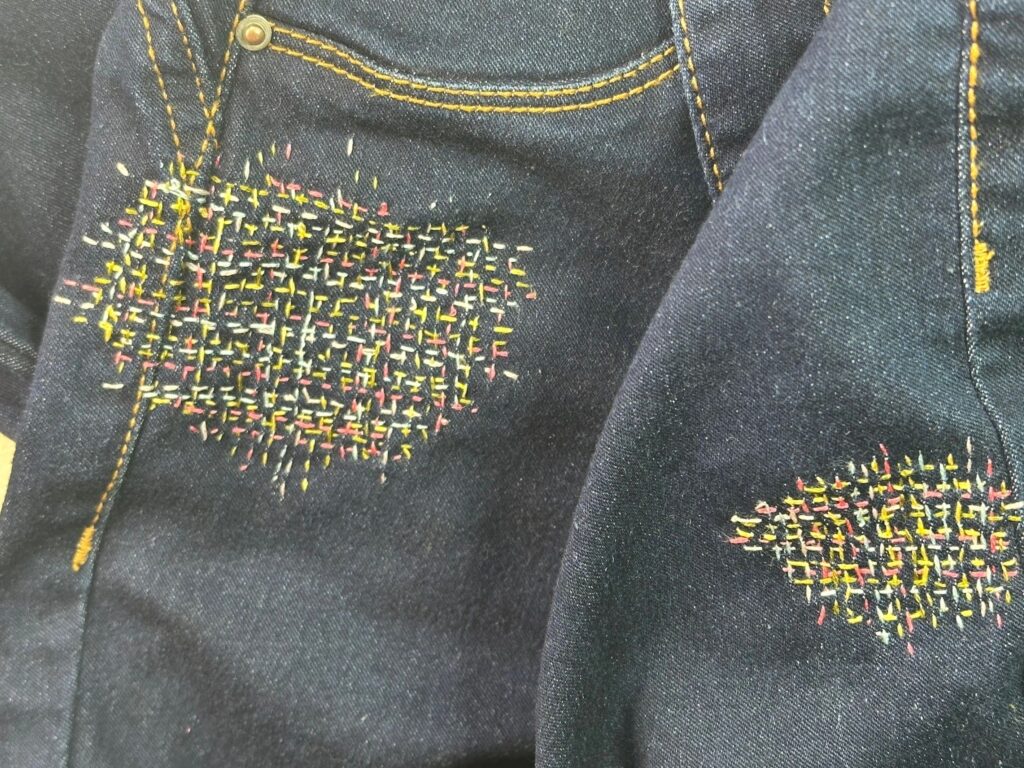
After working through the all colours once, the overall effect was lacking vibrancy. However after repeating the process with each colour again, the pattern filled out to transform the effect. The colours popped and the pattern became much more solid. This improvement would have further been enhanced if I had repeated stitching all the colours a third time.
The edges are deliberately uneven to create an informal look. It was easier to work the design in this way. The denim has no clear thread lines to mark the woven fabric so to achieve sharper edges, a chalk line would have been required to mark my needle placement.
The second, smaller embroidered patch was placed on the other leg of the jeans. I followed the same process as the first patch by drawing the guidelines with chalk and then stitching those lines with my first colour. Then the grid was filled in freehand using all 5 colours.
After finishing the second patch, I held the two patches side by side to compare the density of patterns. The larger patch seemed to have wider gaps between some of the rows of stitching so I went over those gaps with my colours again to match the stitch density in both patches.
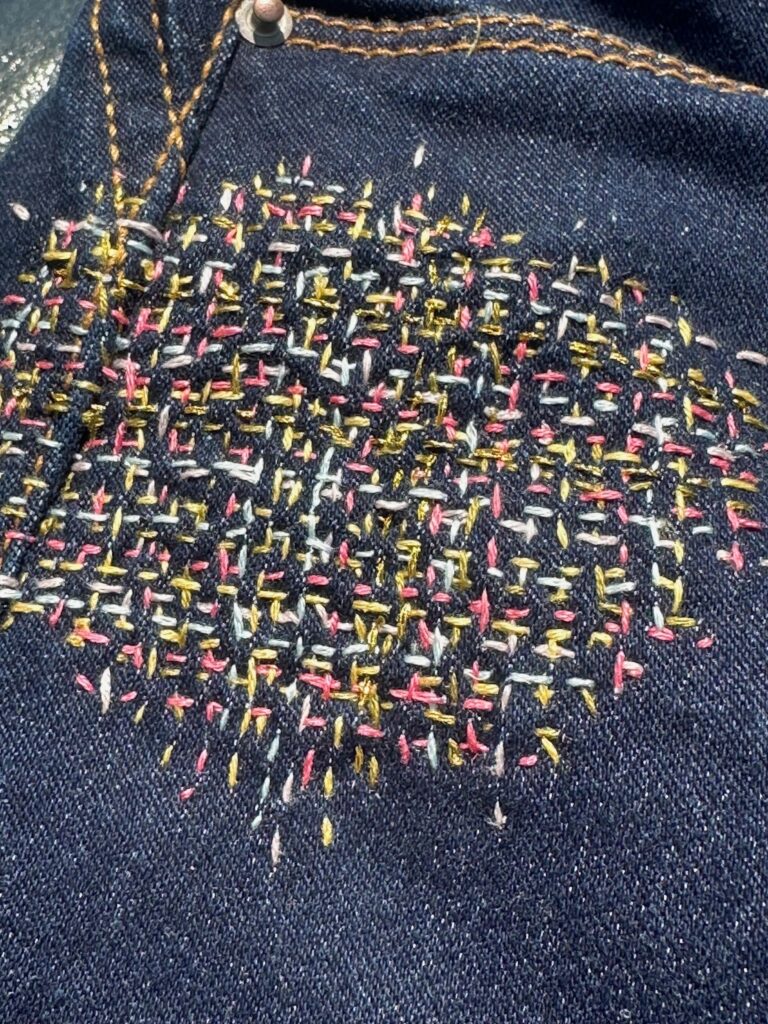
When I finished stitching the coloured threads I decided to add a few lines of sparkly, metallic, gold thread to the pattern. This would make the work a little bit more special and add further interest.
I haven't used this type of thread before and found it very different to use than ordinary floss. The metallic thread behaves like metal wire and the twisted strand unravels very easily into 2 separate ply. Using 2 separate strands at once meant that I had 4 ply being managed, which required a bit more care. I found it was easier to stitch only single stitches at a time and I needed to draw the threads carefully through the fabric, gently pulling all of the 4 ply each time. If the strands were bent and twisted when i pulled them, that bend and twist stayed in the memory of the thread, and needed to be massaged out with my fingers.
Despite this learning curve, I love the look of the metallic thread in the project. It provides a subtle feature to the work and should catch the light when worn.
As a beginner to stitching, this project was straightforward and the results were very good. In hindsight,if I were starting this project again, I would consider using really bright, strong colours. I had thought that the pale pink thread would provide a good contrast to the dark denim, however, standing alone on the fabric it seemed to be quite washed out and perhaps white would have been a better choice. Later though when the colours are massed together, the lack of vibrancy in a single colour, becomes irrelevant.
Also the placement of the patches meant my needle would pass through the seams of the jeans. Those several layers of fabric and stitching of the seams were quite tough. It would have been much easier to pick a spot on a garment with no seams such as a shirt or T shirt. The patches offer substantial reinforcement to the fabric and this project would be useful for garments where major wear and tear may occur, such as the knees of kids trousers or the elbows of shirts.
The project materials were the jeans which were purchased at a thrift store, DMC threads on hand, along with the marking chalk, ruler, needle and scissors. The chalk came from a Birch "Chalk Wheel with Refills" pack. Overall the project took about 4 hours. I love the effect and it is suitable for the absolute beginner.
See the video tutorial for Running Stitch here with video of Evie being created.