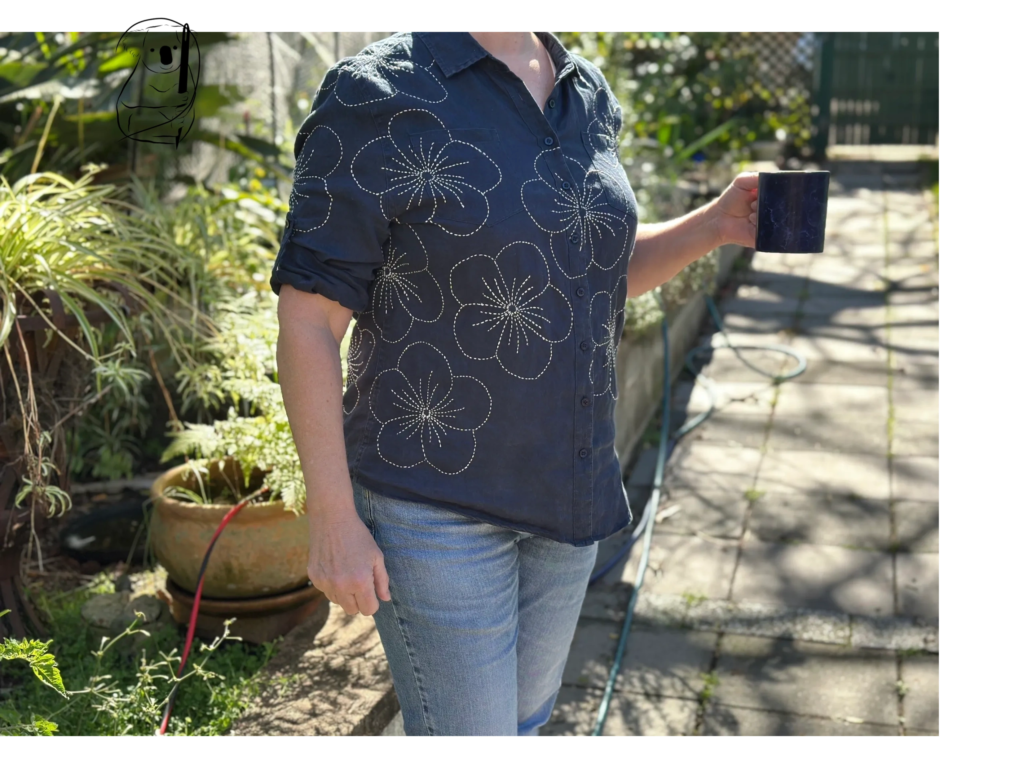
After completing my Sashiko coasters project, I was keen to take on another which would not be as constricting as a "follow the lines" kit.
Many of the images we see of Sashiko have the traditional look of navy fabric with white or ecru stitching. It's a great colour combination and is timeless. So for this project I found a navy coloured, linen blouse at a thrift shop and matched it with ecru Olypmus Sashiko thread.
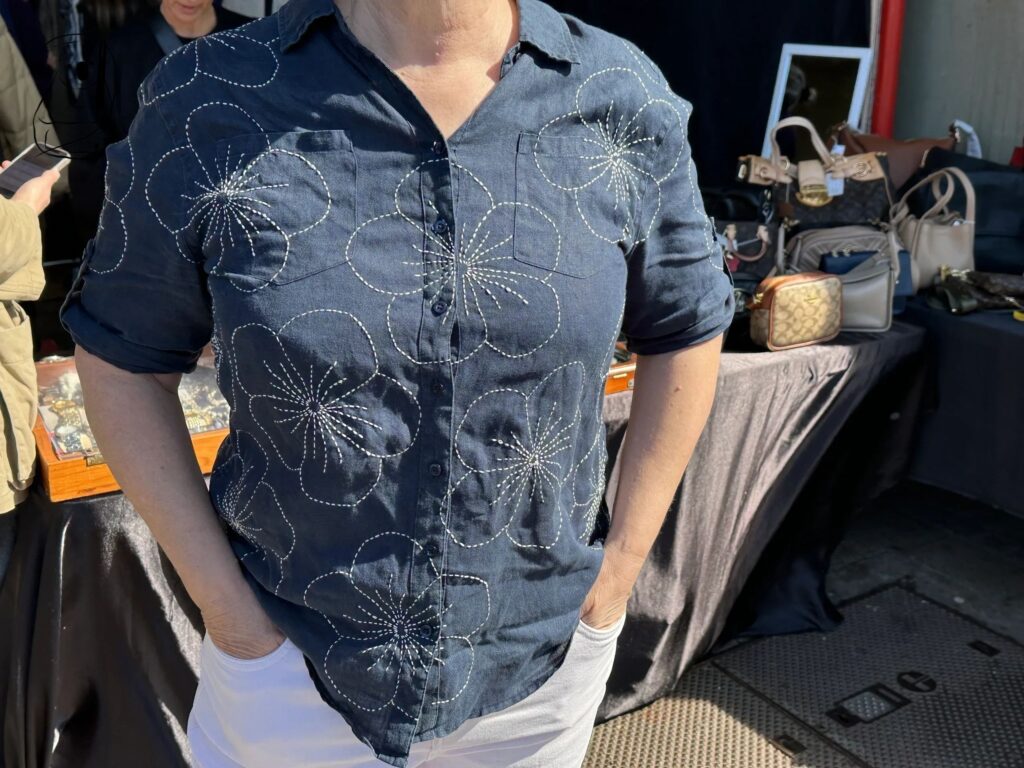
The image I chose to place on the fabric is a traditional one of a flower. Here I have used a traditional design with straight lines, curves and jumps across fabric.This image mostly appears in the media with a single stamen over the petals and I chose to put in 3 stamens which allowed for the flow of stitching around the flower. My original concept was to have many flowers over the blouse fairly tightly packed together. This worked well initially, however as more and more flowers were completed it became more difficult to neatly fit in additional flowers. Hint: the less tightly packed in the flowers are, the more wriggle room you have to keep adding more images.
In keeping with the number of flowers on the blouse, a part of the concept of this project was to work repetitively on a piece to figure out the right way of stitching Sashiko and practice it. Starting off, I was wrong about many aspects of Sashiko, beginning with the way I held the needle, which marker pens to use, and stitch length being a bit variable. We will discuss the learnings from this project below.
Each flower took approximately 55 minutes to complete. Some were a little faster however a few were problematic due to their positioning on the blouse and took longer to complete. Several flower images sit over front pockets, front plackets and over the back yoke. I tried my best to keep the facing of the back yoke clear of stitching and was mostly successful. I thought this may improve the overall look of the garment. However this was time consuming to achieve and frustrating. Most difficult of all were the flowers sitting on the sleeves. They required a lot of turning of the garment, separating layers of fabric and managing lots of bunched up fabric. The blouse is now covered with 20 flower images, which is a big investment in time but I think the results are worth it. The garment looks amazing, I learnt a lot from the experience and the repetition of the stitching did improve my skills.
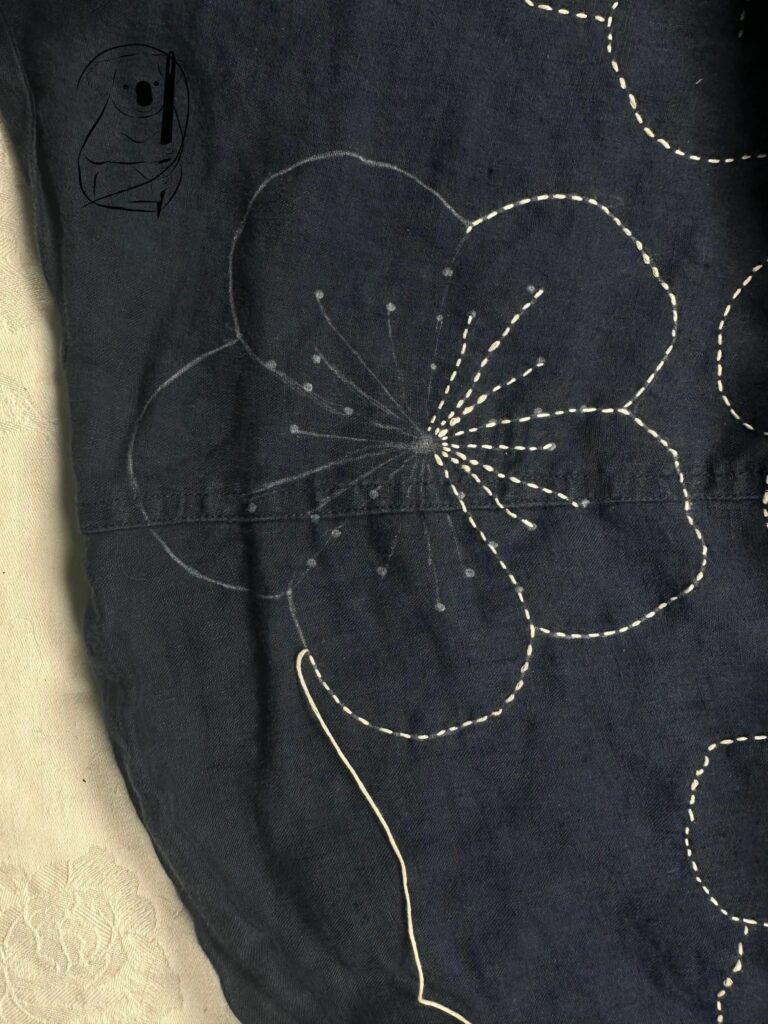
The path of the stitching around the flower is shown in the video and it was one I worked out without too much calculation. It no doubt is not the only path that works, nor may it be the most efficient. However it did work out well and having a map to follow around the flower provides structure to the stitching and a measure of progress for each flower.
You will find tips on how to stitch Sashiko in the video, as well as below in this blog. If you like the look of the garment but don't want to invest too much time on it, then reimagine it with fewer flowers, more space between flowers or a gradient of flowers - more at the bottom than the top. Even a single, simple flower on the front of a shirt makes a statement.
All the tips and "rules" encountered so far show just how much there is to learn about Sashiko. Underneath the simplicity of the images made using Sashiko is precision, care and focus. Therein lies the elegant beauty of this craft and its ongoing appeal.
What did I learn from this project?
Holding the needle correctly.
I completed the first few parts of the video holding the needle with my left hand as if I were simply stitching normal embroidery. This actually worked out OK and I started to build up a rhythm to the stitching. However once I changed to the new grip with a thimble, I had more control over the fabric, feeding it to the needle with fingers on my right hand. Again I was able to build up a rhythm . Holding the needle this way causes the hand to naturally want to push the back of the needle against the Sashiko thimble. If I wasn't wearing the thimble, then the stitching might be less streamlined and I would have to pull the needle through fabric rather than push it from behind with my palm.
Negative space is as important as the stitch.
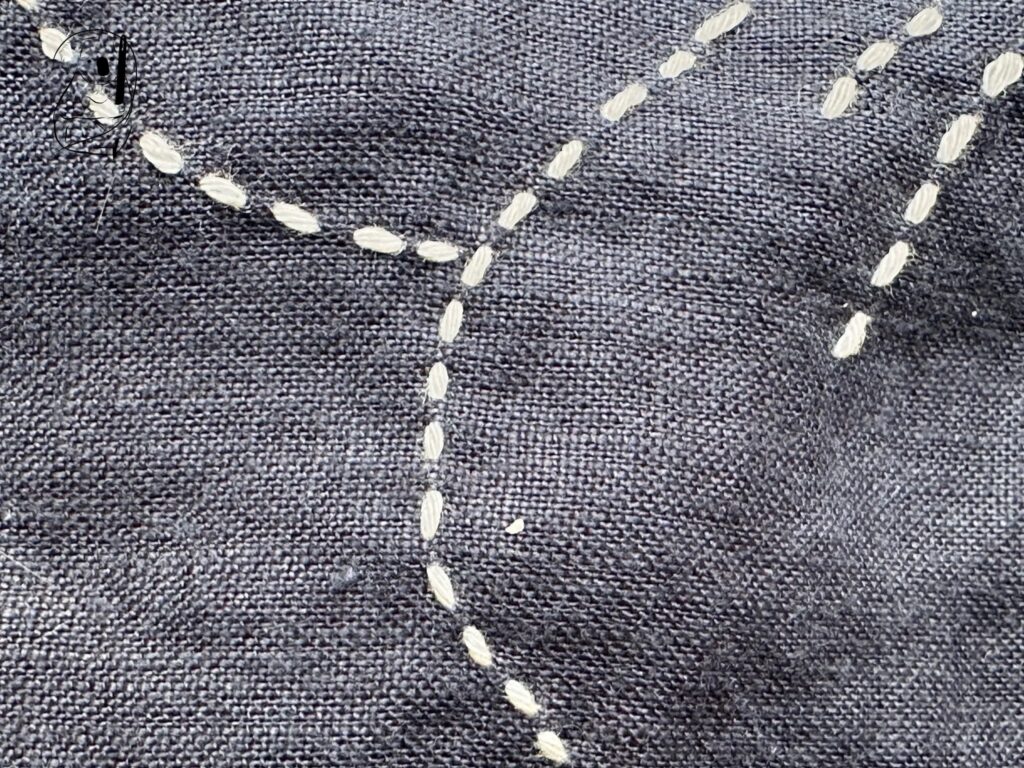
It is easy to focus only on the stitch length to try and keep each stitch even. But the look of Sashiko is tarnished when the space between the stitches is uneven. This seemed particularly so when the gaps between the stitches was too small. It isn't easy to monitor the stitch and gap lengths once the stitches are loaded onto the needle. The fabric gets folded and squashed up and actual length of the stitch disappears entirely as more and more stitches are loaded up. It was a little easier to gauge the stitch length as the needle pierces the fabric but I found that the silver needle against the navy colour of the fabric was quite difficult to see at times.
Sewing on a garment is not like stitching a sample piece
When watching Sashiko videos, there never seems to be the drama of moving a garment around and turning it after every line of stitching. This is a fact of life when dealing with real garments. Every change of direction, and every curve means that the entire garment has to be moved to suit the direction of stitching. This reached a pinnacle when stitching on the sleeves. In addition to turning the garment, sleeves required a separation of layers of fabric so as not to stitch the two sides of the sleeves together. Further, starting off a new thread or finishing off the end of a thread required the garment not only to be turned over but the sleeve partially turned inside out.
There was also quite a bit of stretch in the weave of this garment - but only on the diagonal. I am sure that this stretch occasionally caused some stitches to be longer than I anticipated when I smoothed them out.
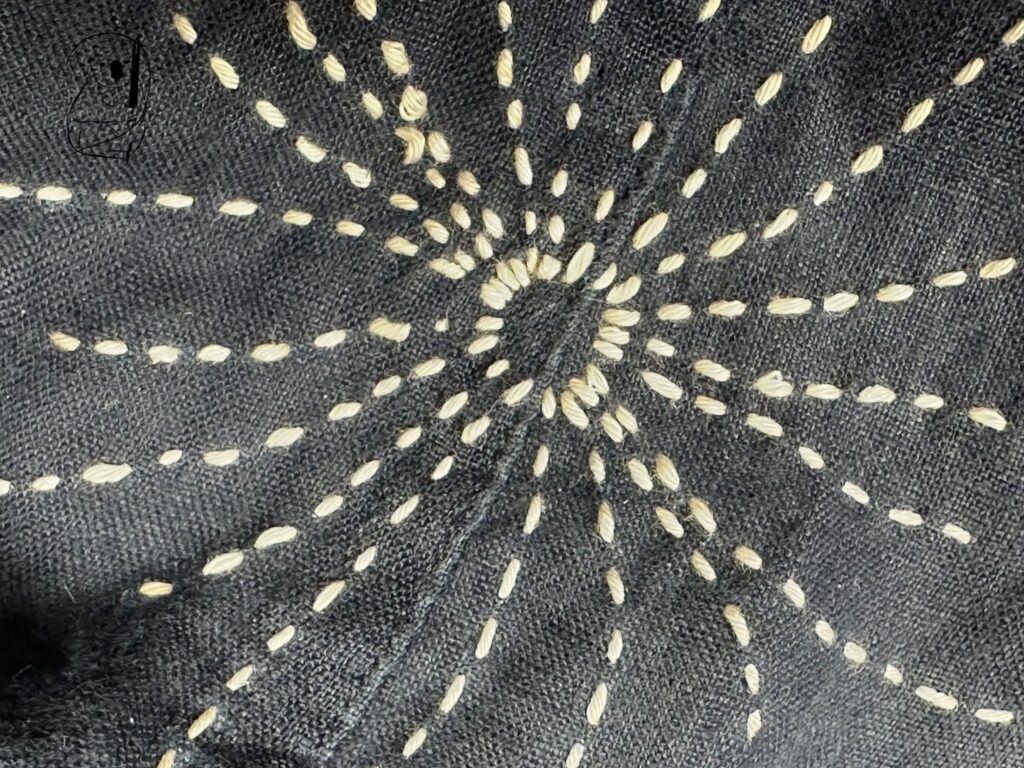
This particular garment has lots of obstacles to easy stitching. Seams were quite tough to push the needle through, the plackets overlap, pockets are stitched on the outside only. The cut of the pattern means that the fabric at the top of the sleeves did not sit flat and the label sewn to the side seam stubbornly tried to get in the way of my stitching. You can see in the photo above that the stitches are running through a seam. The stitches at the seam did not smoothly slide over the needle so it was not possible to stack too many stitches on the needle here.
Marker Pens have different qualities.
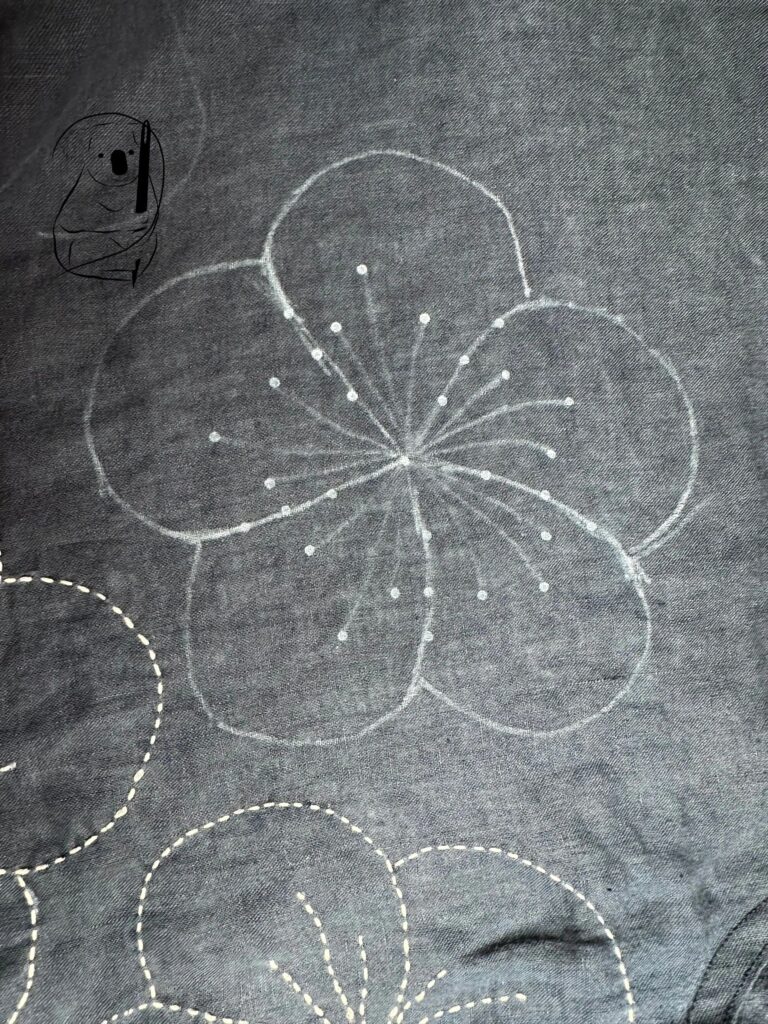
Being navy in colour, the fabric required a light coloured marker pen to trace the flower image onto the fabric. I started the project using a felt tipped marker pen which drew a thick line. This may have been tolerable however these white marker pens don't seem to draw a line which immediately appears. As they dry the white line appears and becomes more solid. This meant that when I drew a line and it didn't immediately appear I often reworked the line thinking the pen wasn't working properly.
This often resulted in a maze of lines appearing on the fabric which were thick and distracting. After the felt marker appeared to stop working entirely I tried using a sharp white marker pencil. This drew a fine line but it was not very strong in colour and it didn't really progress a solution to solving the problem. However it did not work at all when trying to make the dot marking through the template.
I then came across a Clover Iron Away Marker. I haven't used an iron away marker before but this pen had a fine line and seemed a better option. However, it didn't make the dot markings through the template as visible as I wished, and again the lines don't immediately appear but only become visible when dry. So the final outcome was a mix of Iron Away Marker for the template outline and felt pen for the dots in the template itself. I feel that since white marker pens generally seem to appear when dry, this may be an ongoing issue for the navy fabric.
Repetition is a great teacher
One of the objectives of this project was to find a repetitive project with which to practice Sashiko skills. This project fits the bill perfectly. I had time to practice and improve, and time to figure what didn't work very well and try to overcome those obstacles. However, if you like the idea of this project you can reimagine it with fewer flowers, more space between flowers or perhaps fewer flowers near the top of the garment and more at the bottom. This would allow you to avoid having to deal with issues around dealing with sleeves and front pockets.
To make things easier again, try this idea on a simple top with just two pattern pieces - a front and a back. No set in sleeves, no front opening and no facings.
After completion I washed the garment in a lingerie bag in a normal load of washing. Because some threads are carried across distance, those threads catching on other garments in the wash is a consideration. As mentioned this garment was made using a thrifted blouse and the Olympus Sashiko thread which cost me AUS $9.70. Time wise- 20 flowers at 55 minutes each is an investment in time however the result makes the effort so worthwhile. It is a favourite blouse now and it feels gratifying to wear something which took time and skill to create and reflects my passions and interests.
Watch the project come together in our YouTube video.
Download the free pdf template for the flower on our Resources page.
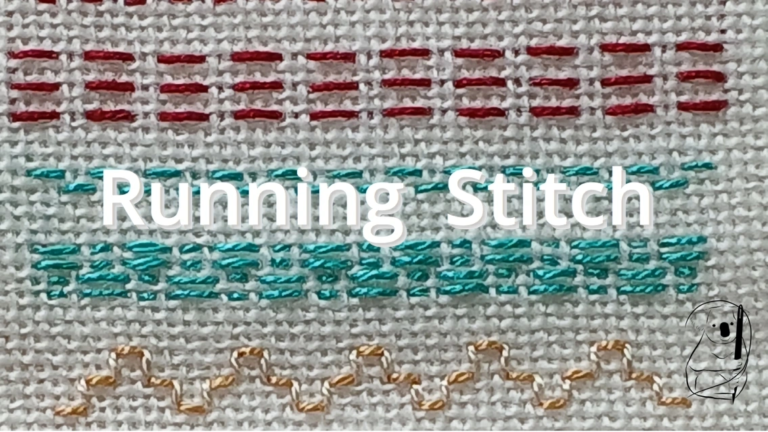
See our video tutorial on Running stitch on YouTube.