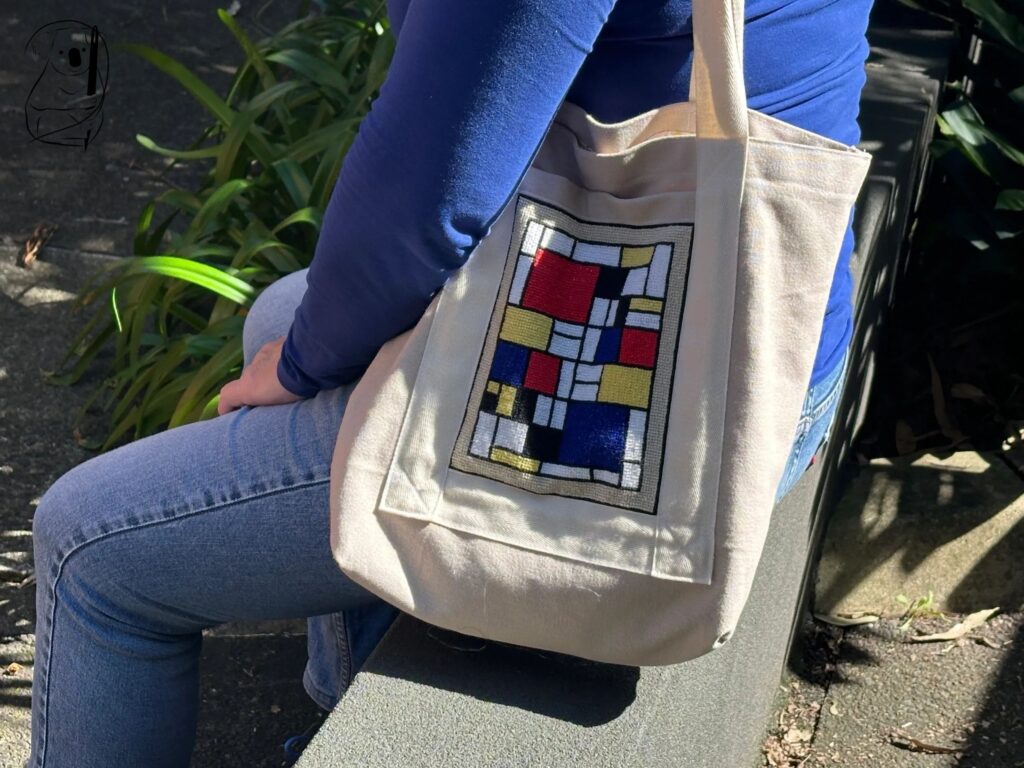
The Piet Tote Bag is a stunning and practical application for a Cross Stitch work. Here the colours and shapes of the piece are the highlight of the show and it is easy to understand how many view Mondrian as a gifted artist. The combination of colours are striking and the shapes provide a robust form to catch the eye.
The Tote uses a canvas fabric to provide a tough and hard wearing material for the outside of the bag and the inside is a cotton fabric lining showing images of Australian animals. The canvas was picked up as a remnant from my fabric store in their furnishing fabrics department. The bag is also strengthened by the cotton tape which surrounds the image of the artwork. It is stitched almost the whole height of the bag giving plenty of support to the bag when used to carry substantial loads.
For this Tote I have used the image of the artwork to form an outside pocket which is held in place by the cotton straps. It is kept closed with a magnetic bag clasp. Inside, the lining has its own pocket plus a loop to hold a key chain. If you want to simplify this Tote, the inside pocket could be omitted. I have also softened the strap handles by stitching in some short lengths of rope to make the handles rounded.
As an extra feature, the box corners of the lining have been stitched to the box corners of the canvas shell of the bag. This ensures that the lining does not sit loosely in the bag or lift out of the bag if you were to tip it upside down.
The materials used here should ensure that the bag is washable, though I do suggest that hand washing is preferable to machine washing. And I would recommend that the key chain clasp be removed for washing in case it gets caught on items you may be washing at the same time or the strap handles.
My materials used were:
Canvas fabric for bag
Cotton fabric for lining
3 metres of cotton tape 4cm wide
cotton piping cord (Maria George brand) 7mm X 10m (I used 32 cm of cord)
one magnetic bag clasp (Abbey Road Bagology 18mm magnetic snap sew on)
one metal opening hook (Abbey Road Bagology 29mm spring clasp)
interfacing
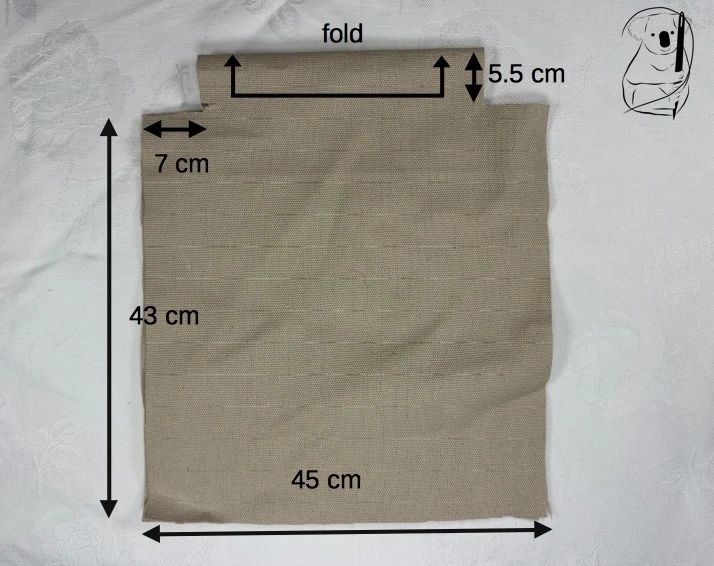
The canvas fabric to form the outside of the bag was cut on the fold. This was possible because the fabric is plain and having no seams across the bottom gives a more streamlined look.
You will see that the lining fabric was not cut on the fold. When you have a fabric with an up and down pattern, you need to cut each side of the lining with the pattern facing upwards, otherwise one side of your lining will be lying upside down.
The cut canvas was marked with centres for both the horizontal and vertical lines. The Cross Stitch piece was also marked at the horizontal centre in wash away pen. You will see that the pattern itself has centre lines, both horizontal and vertical. This will provide some guidance to placing the pocket in the middle of the bag.
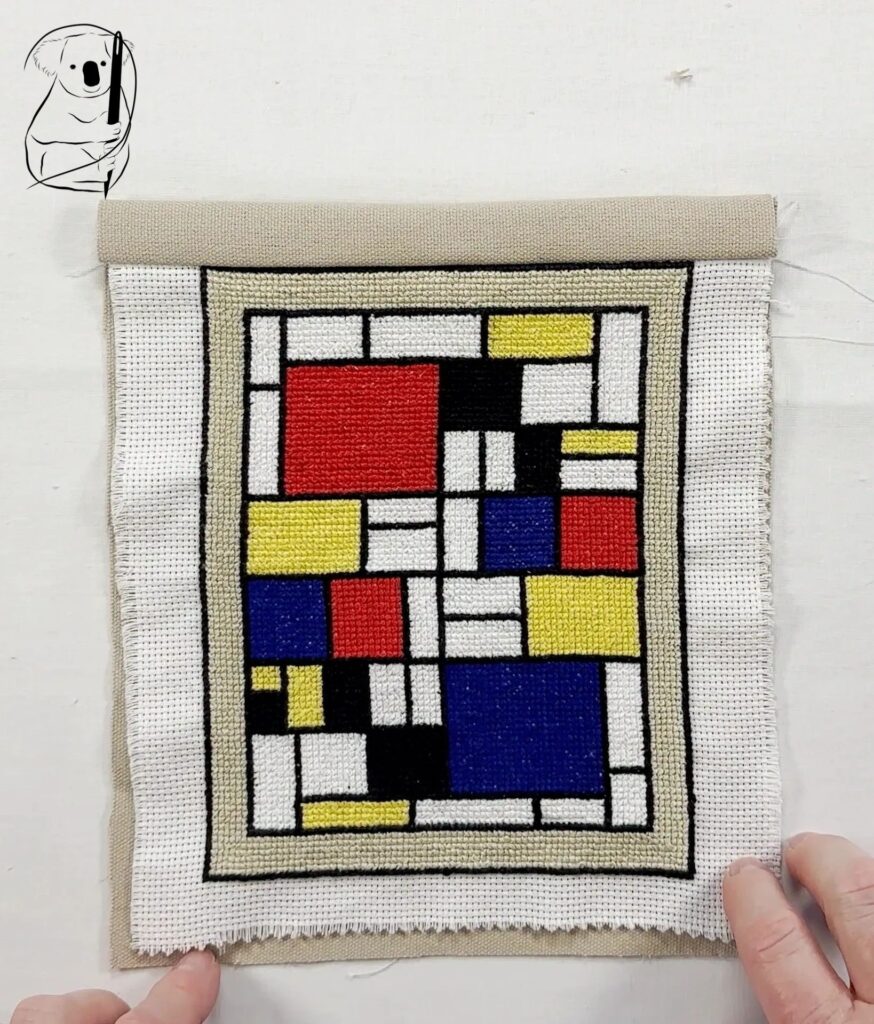
CREATE THE FRONT POCKET
With some spare canvas, I cut a rectangle of fabric 24 cm X 19cm. This was enough to match the width of my Aida and the height of the aida plus 4cm. That extra 4cm forms the top edge of the pocket which frames the top of the Cross Stitch.
For your own work, use your Cross Stitch as a guide. You need to match the dimensions of the adia plus 4cm at the top. Stitch the aida to the canvas right sides together, then iron the seam flat. The stitch line needs to be right on the edge of the images border.
Fold the canvas back 2cm for a border and the rest of your 4cm will fall back behind the image. Press the top edge.
Stitch across the canvas close to the seam with the aida and the pocket front is formed.
Once you have the aida backed by your pocket lining, position it on the front of the canvas bag to see where it should be best placed. When doing a mock up of the pocket, I placed the cotton tape around the pocket to see if the positioning looked balanced. At the same time I pinned the hem at the top of the canvas to present the finished size of the bag. At the top hem of the canvas, I folded the edge over 3cm, then folded it over again another 3cm.
When a position is decided upon, cut a length of tape to cover the bottom of the aida and stitch in place. This length should extend a little beyond the image edge to allow for a little overlap with the tape covering up the sides of the aida. Stitch across both the top of the tape and the bottom. Again the tape should meet up closely with the border of the image to hide any bare aida.
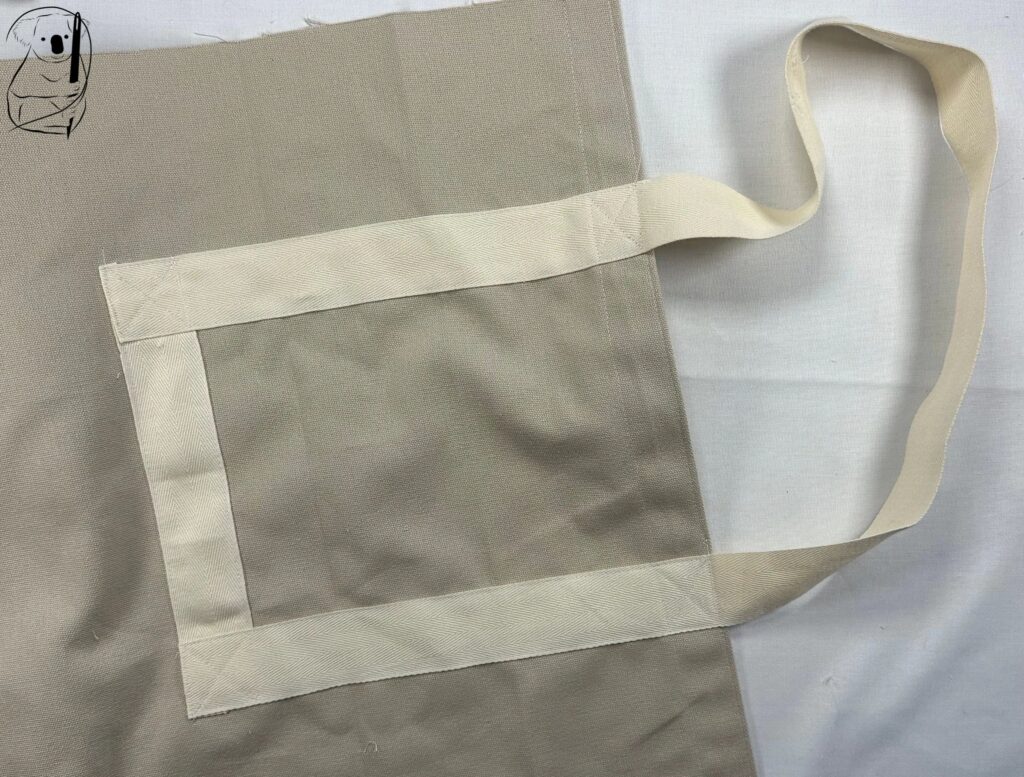
Once the position of the pocket has been determined and the tape stitched across the bottom of the image, I stitched the hem of the canvas and then pinned the straps onto the side of the bag.
STITCHING THE TAPE AND HANDLES
Starting at the bottom side of the image, the tape was turned under at the end. It should cover the ends of the tape already stitched across the bottom of the image. The tape is then run up to the top hem of the bag, pinning as it is placed. Without cutting the tape, it is run free before rejoining the bag near the other side of the image. I allowed 62cm of cotton tape to act as the shoulder strap.
I checked another one of my handbags to determine the length of the bag handles. The 62 cms provides enough length to have the bag to comfortably sit on the shoulder and allow for my other arm to reach into the bag to retrieve items without putting the bag down.
This is a personal choice and you may want to check your own suitable handle length from one of your favourite bags.
To reinforce the cotton tape, I stitched each corner with a X of stitching through the hem and through the tape across the bottom of the image. Be sure to run stitching along both sides of the tape close to the tape edge.
Once the tape was stitched around the front pocket and handle, I found the corresponding positioning of tape for the other side. I did this by holding the bag front and back together, right side out. Then I placed pins in each corner of the square formed by the tape. On the other side of the bag, these pins showed where the tape should sit. The second handle was then stitched down in exactly the same way as the first.
With the handles in place, both right sides are pinned together and the side seams were stitched. Here, I stitched the seam using a full 5/8 inch seam allowance. After stitching I pressed the seam, then stitched the box corners and again pressed the corners.
This completed the outside of the bag.
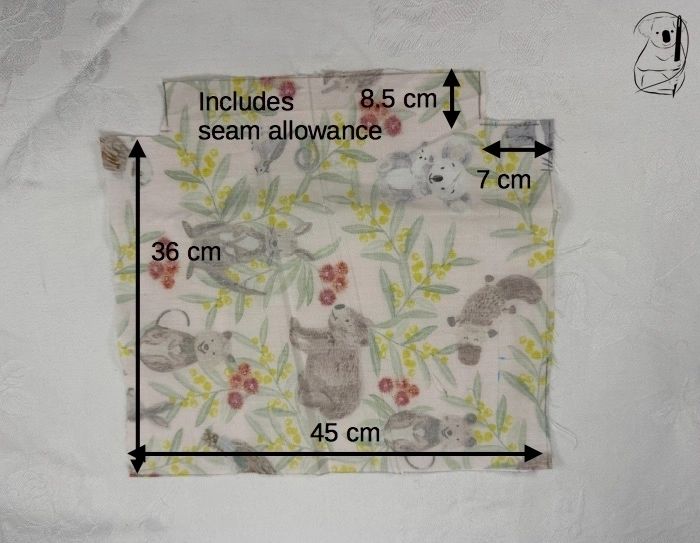
MAKING THE LINING
The lining is made in a very similar way to the outside of the bag.
As mentioned previously, the lining is not cut on the fold but will require a seam at the centre bottom. This will allow the pattern to sit upright on both sides of the bag. If your lining fabric doesn't have an up down pattern, then you could indeed cut the pattern on the fold similarly to the outside. Be aware that the lining is not as tall at the outer bag and the measurement of the side of the fabric (excluding the box corner) is 36 cm long.
INSIDE POCKET
Starting with the inside pocket, we cut a piece of lining fabric 19cm square. On one side we fold over the edge by 1cm and press ,then fold the edge over another 1cm and press again. These folds are then stitched down. Then around the other 3 sides , we fold over 1cm hems and press again.
After pinning the pocket onto the centre of the lining we move onto the pocket flap.
In the canvas fabric, I cut 2 pieces of canvas 19cm X 5cm. These are stitched right sides together on 3 sides. After clipping the corners, the flap pieces are turned right side out and pressed.
The flap is then stitched to the lining, along it's long unstitched side with the flap pointing upwards. Then the stitched the flap is folded down and pressed. It should cover the top of the pocket piece which you pinned in place. Next, stitch down the one side of the flap, continue on down the side of the pocket, then across the bottom of the pocket and back up the other side of the pocket and the other side of the flap.
If you wanted extra comfort for the safety of your valuables, a press stud could be stitched onto the flap and pocket to ensure the pocket contents are more secure.
KEY CHAIN LOOP
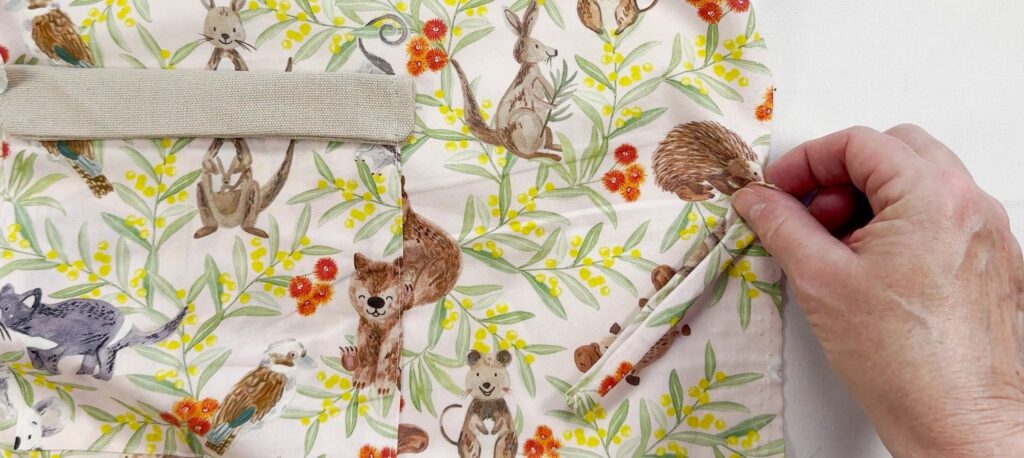
The key chain loop is made from a piece of lining fabric 25cm X 4cm.
Stitch the fabric lengthwise roughly down the middle. Keep a long length of thread at the end of the stitching. Trim off the fabric's raw edge top leave a narrow hem.
Threading the extra thread onto a needle, push the needle through the fabric, eye first, and bring the thread to the other side. Then pull the thread to draw the other end of the fabric through the tube of fabric and turn the piece inside out. Be careful not to pull on the thread so hard it breaks.
Press the loop when it has been turned. Fold in half and pin the loop to the side edge of the lining. I slope my loop downwards as the weight of the keys will pull it down. I think having the loop hanging down may place less stress upon the seam at the join.
With right sides together, pin the front and back of the lining and stitch the side seams with a 5/8 inch seam. After pressing sew the bottom seam, again with a 5/8 inch seam. I trimmed this seam then pressed it.
As with the canvas bag, stitch the box seams of the lining and press.
JOINING THE BOXED CORNERS
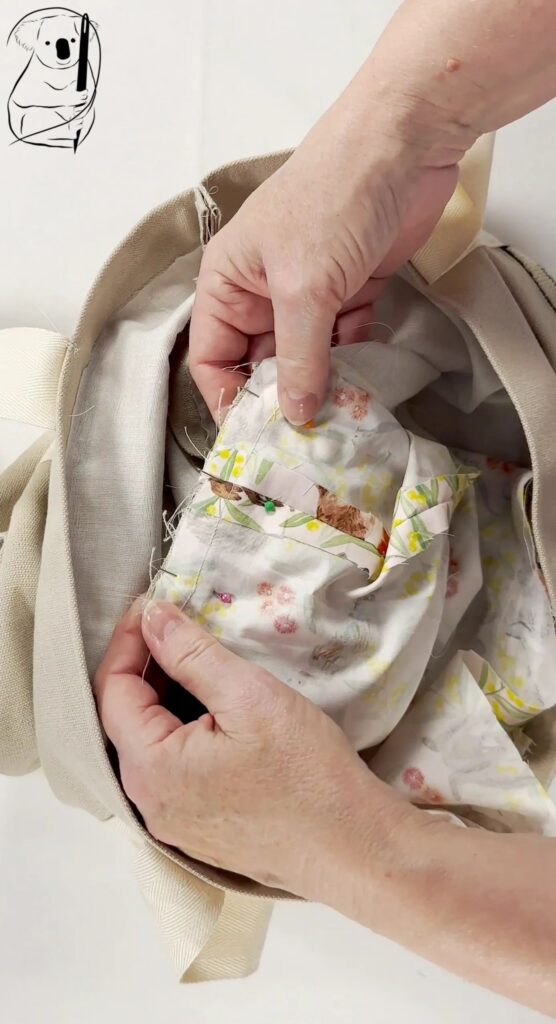
We are now going to join the lining to the outer canvas shell at the box corners. This will ensure that the lining stays in place and can't fall out of the bag.
Place the lining in the bag and match up the corners.
Move the canvas fabric back to expose both the canvas and lining box corners at one end. Line up these corners together and pin.
Sew the two corners together but NOT on the old stitch lines.
You will need to stitch the two together between the raw edge and the seam line.
Try a line mid point between the box corner seam and the raw edge,
If you sew on the seam itself the box corners will not sit flat but will tend to bulge when turned out. Stitch both corners
ATTACH LINING HEM TO CANVAS HEM
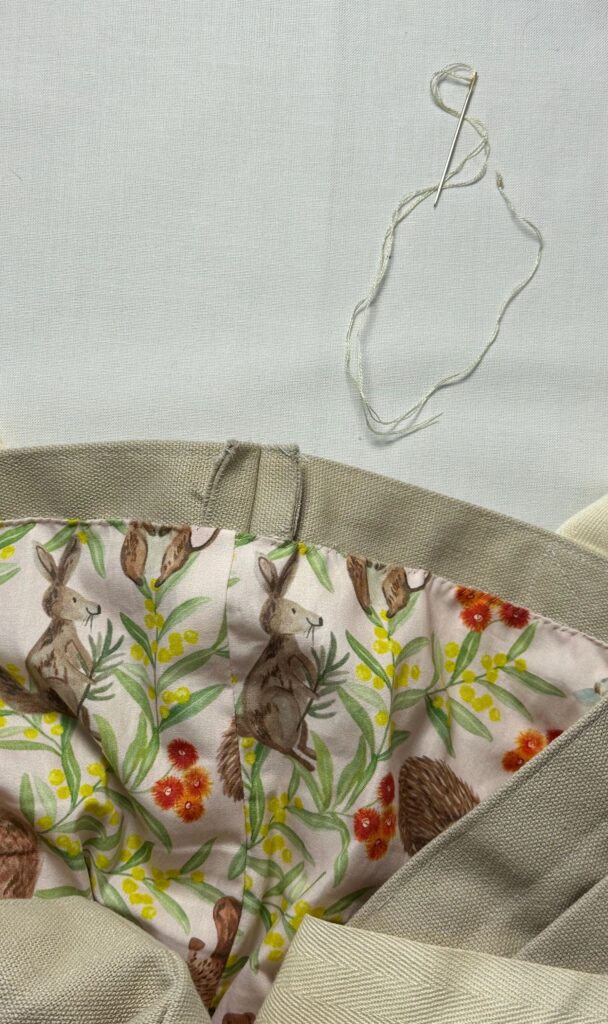
Now turn the bag inside out to fully expose the lining. Matching the side seams, fold over the edge of the lining and stitch it to the canvas at the bottom of the hemline. I used Whip Stitch for this. See our video on Whip Stitch next week.
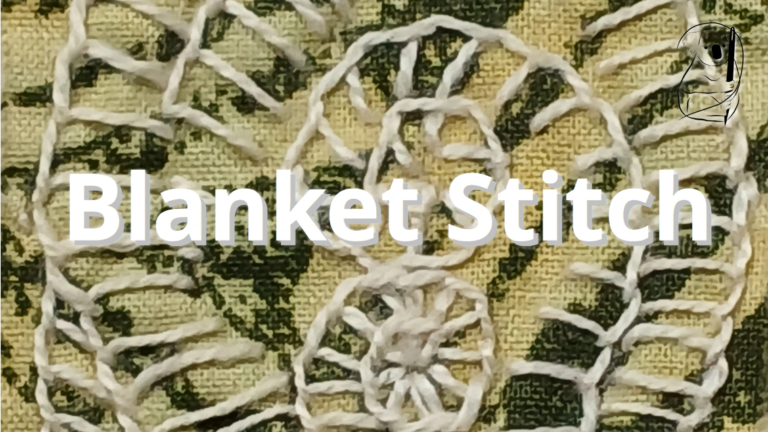
You can see in the photo to the right that there are some exposed raw edges next to the seam of the canvas. I used a Blanket Stitch to hold these edges down. See our Video on Blanket Stitch.
For the finishing touches, I stitched the magnetic clasp to the outside pocket taking care to only go through one layer of fabric with my needle. My previous mark on the centre of the outer pocket helped to guide the placement of the clasp.
I lastly attached the clip to the key chain to hold my keys.
This project took some time to complete. The Cross Stitch was 2 weeks of solid stitching and the Tote bag was a steep learning curve. The results here fully justify the efforts.
I love the fact that this embroidery goes with me everywhere, and is not secluded in a frame away from sight. The Cross Stitch is an integral part of the design and the end result is practical and hardworking while still being beautiful.
To keep things balanced, is there anything I would change?
As mentioned in the Piet blog, I coloured in the black squares of aida when doing the Cross Stitch. I did this to prevent the white aida showing through between stitches. If I had known how well this would turn out, I would have coloured in the red and blue squares as well. It did make it a bit more difficult to see the black stitching on a dark background, but a lot of this cross stitch was white thread on white aida. I just accept that Cross Stitch needs constant focus both mentally and physically. I did need to use my magnifying lamp and reading glasses for much of the Cross Stitch.
With regard to the construction of the bag, next time I will alter the construction method and stitch the lining and outer bag together to produce a clean hem with no exposed seams. This is perfectly possible, just a different method. I think hiding all the seams will give a more streamlined and clean look.
You may have gotten tired of reading "press, press, press" in this blog. It seems to be a secret of tailors that whenever a seam is sewn, it needs to be ironed to achieve professional results at the end. The canvas needed more ironing than the cotton lining but I feel it not only improves the look of the bag but makes stitching the bag easier. So when in doubt "press...."
One last comment should be made about the interfacing you see in the video which is not mentioned in this blog. I had intended that this bag should stand upright on its own which would require fairly heavy interfacing. The interfacing I purchased was unfortunately not iron on interfacing and there was really no way to make it adhere to the canvas. I was unable to purchase the type of interfacing I wanted so instead opted for light weight interfacing which was not nearly heavy enough to make the bag stand upright. If you are lucky enough to find the heavy duty iron on interfacing, I would trim it so that it sits within the seam lines. Interfacing, when stitched into seam lines can add bulk and of course the extra thickness makes stitching a little more difficult.
On to the next project..
Watch the making of the Piet Tote bag on YouTube.
Watch the Piet cross stitch panel being completed.
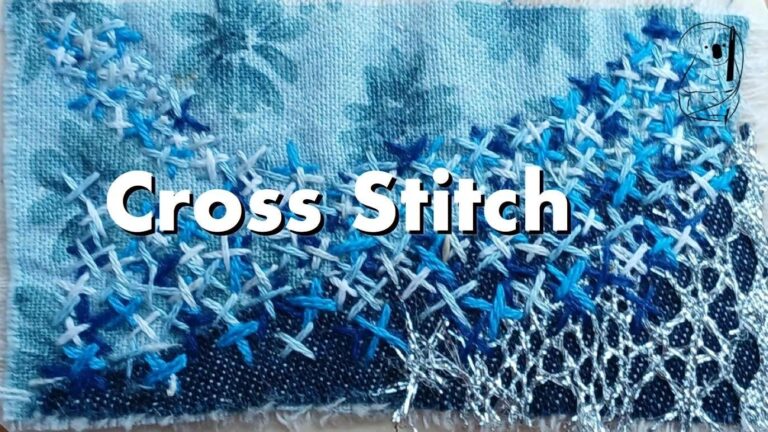
See our stitch tutorial on Cross stitch on YouTube.
Watch our Blanket stitch video tutorial.
Watch our Whip stitch video tutorial. (coming soon)