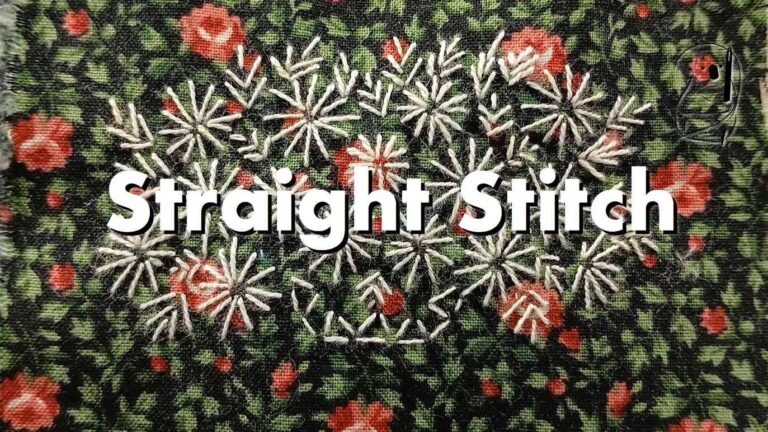
Here is a project which uses the easiest stitch we have looked at so far - Straight Stitch.
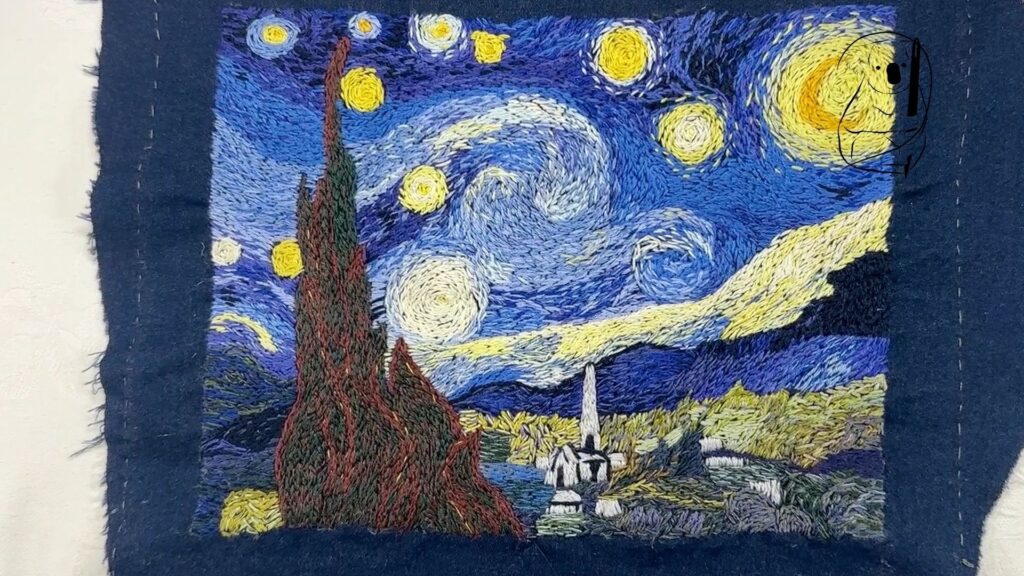
When the original painting "The Starry Night" is examined up close, the brush strokes look like short straight lines running in general directions tracing out a pattern of flowing lines. The brush strokes are different lengths, run different directions and are textured with colour and paint. Our Straight Stitch used here will be the same. Stitches will be uneven, follow general directions only and mix and blend colours to match the original art work.
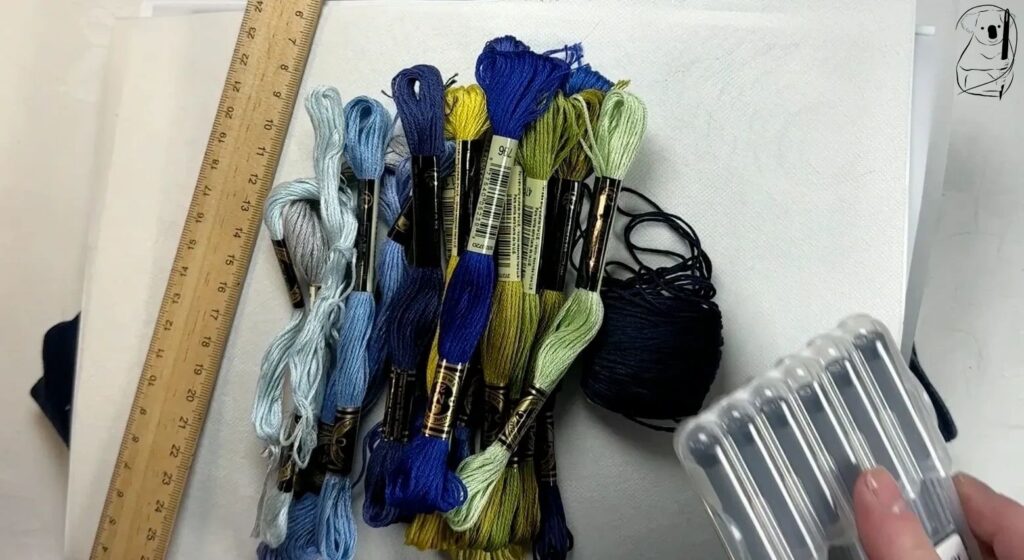
I have used 3 strands of DMC floss here and my "brush stroke stitches" are smaller than the look of the original but still carry the same theme.
To the right you can see the selection of colours I started the project with, but this selection expanded as the project progressed.
I selected images from the internet, and several books. All the images are colourised differently. So I chose one image as my master. When faced this with variation in colours between images, I picked one that I liked the best and stuck with it through the project.
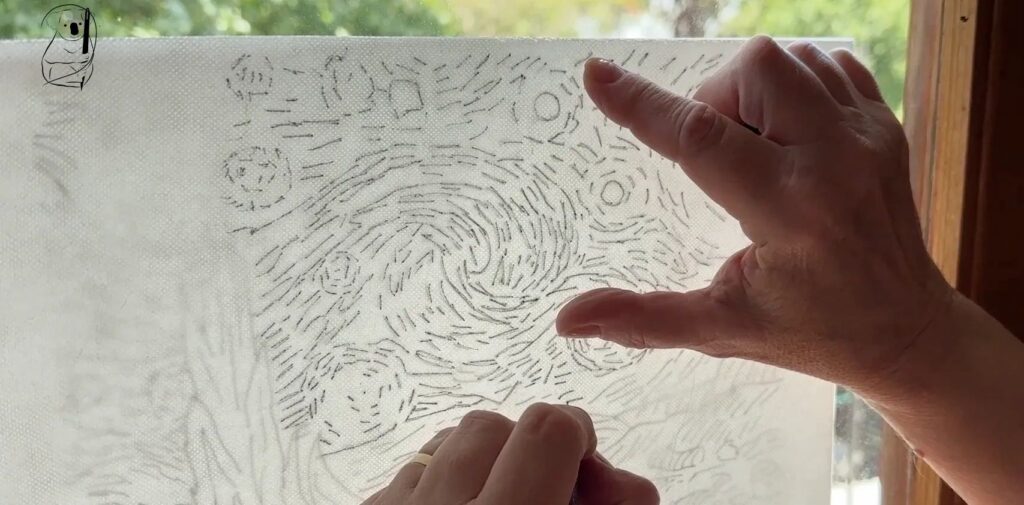
The pattern I used for this project is available in our Resources Section in this website for free. It is a series of lines reflecting the flow of the colours in the painting.
I used my favourite transferring method here, Sticky Water Soluble Paper Stabilizer. The paper is not very transparent so I hold it up to the window to allow the pattern to show through from behind.
Similarly, you can use a light such as a phone light turned on under a clear surface to act as a light box. This works if the room itself is darkened with the room lights off. You can see this being done in the Needlebook video - Monique.
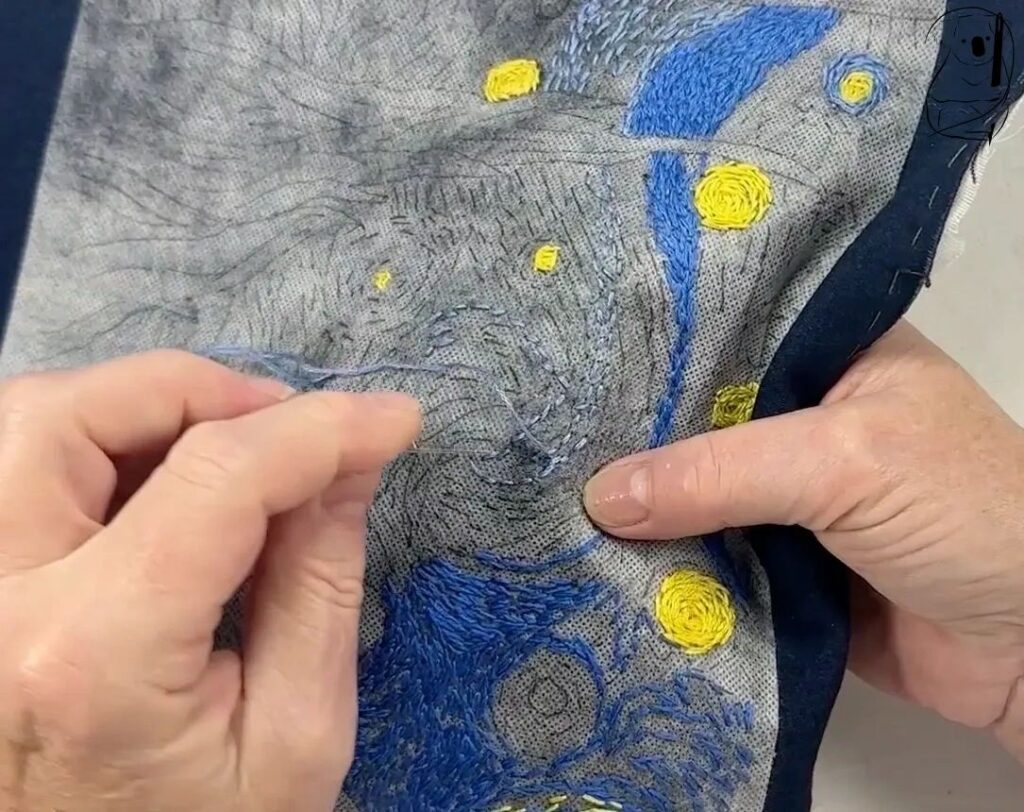
The denim was repurposed from a pair of jeans. I used a size 24 jeans, to obtain the amount of fabric required. Despite my expectations, the jeans only just provided enough fabric for the bag.
This fabric itself had a lot of stretch in it so the pieces were secured with iron on stabilizer. This stopped the fabric stretching as I worked on it. To keep the stabilizer in place for the duration of the project I basted it onto the fabric.
I took several attempts to place the Sticky Paper correctly. The paper was lifted up and reset twice and at the end still adhered to the fabric as if it were the first time. The sticky paper also prevents the fabric from stretching so it is a very firm base for my embroidery.
To start stitching, I took a colour as per my chosen image and followed the pattern lines with stitches - not too close and not too small. Once the flowing lines are in place, more stitches can be added to that area to increase the density of that colour.
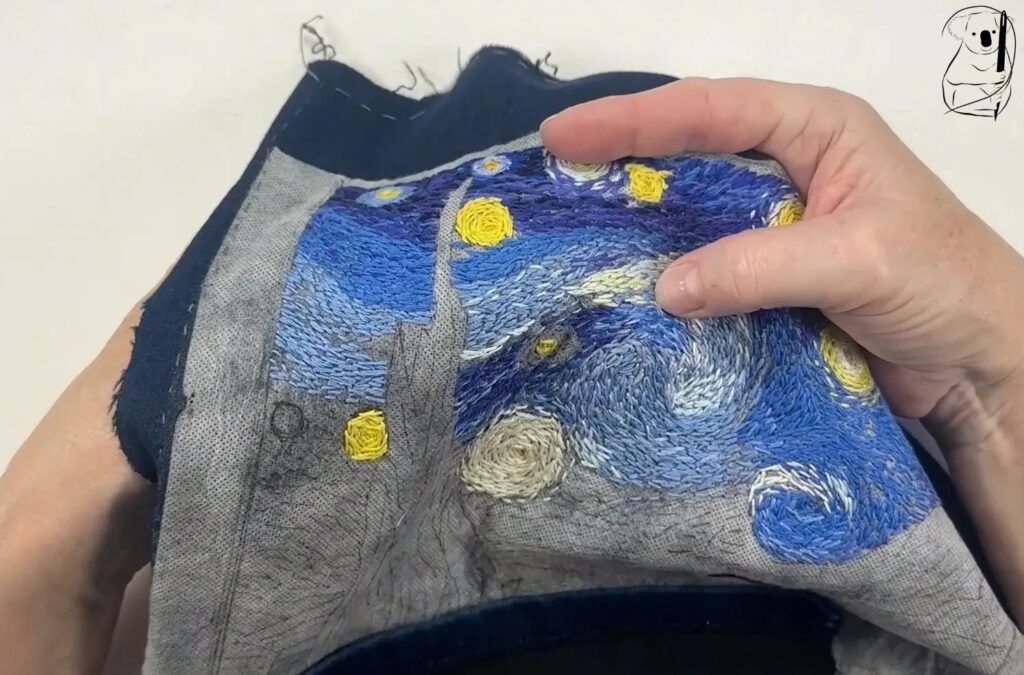
I started working on the sky area of the image as a personal choice. As I moved across the piece I worked on the stars at the same time. In hindsight any blending of the stars to the background sky should have been left to the end of the project.
I went back to almost every star to add more blending later and it was much easier to stitch yellow stitches over the blue sky than work the blue threads in between the yellow stitches.
Small areas of colour can be blended with other colours to vary the tones of the area and give an impression of movement.
The stitches -solid colours and blended colours, should be worked until a solid coverage of the backing fabric is achieved.
For the sky, any gaps in the stitching will show through the dark denim after the sticky paper is removed. This will look natural for a night sky. Gaps in the lower parts of the image shouldn't show through the navy so the coverage here should be quite thorough.
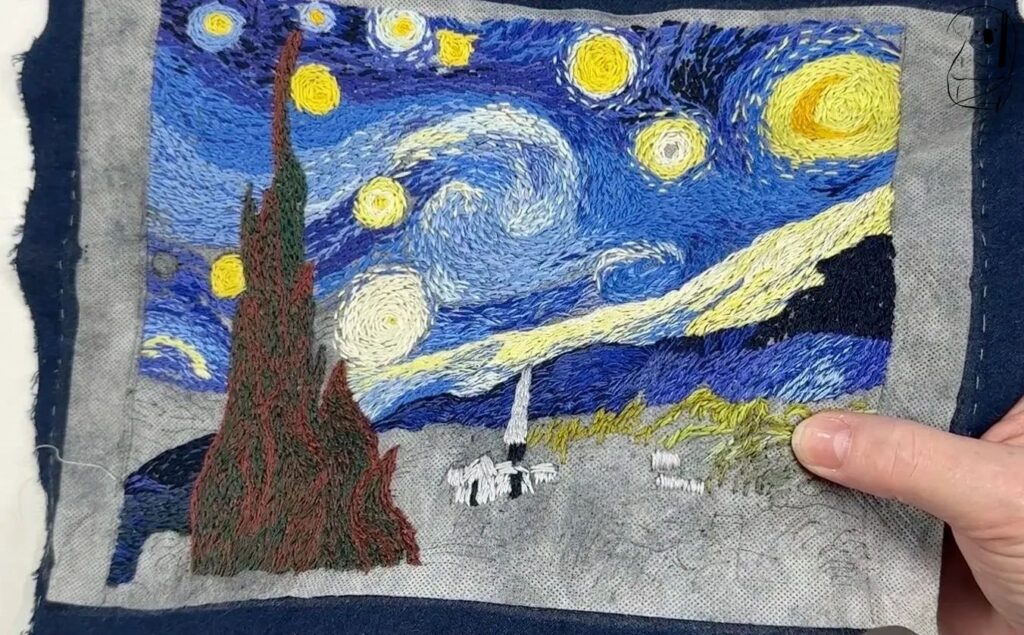
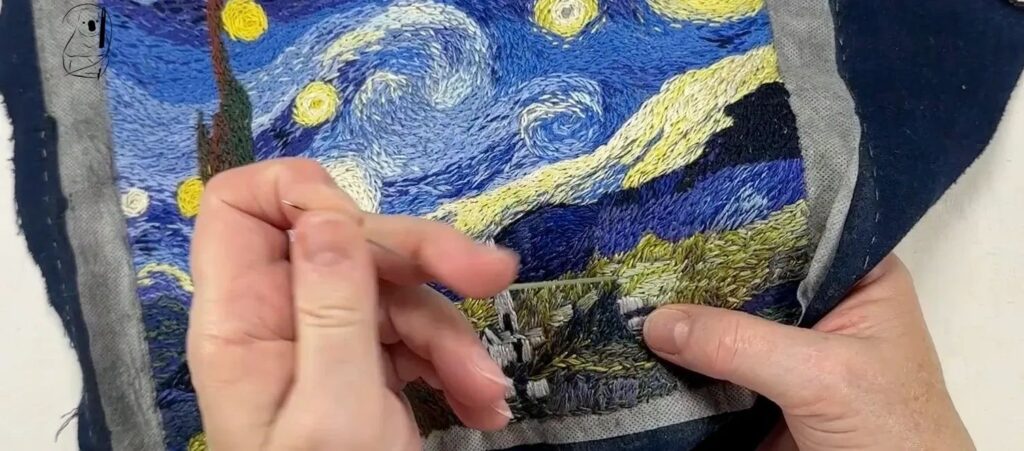
The vegetation in the foreground has a different scale and organisation to the sky. The stitch lines run in all directions in small patches.
There are small fields adding a bit of structure. And colours I have used here are mostly blends of 2 or 3 different colours. The blending here utilizes 1 strand of gold and 2 of green, then 2 strands of gold and 1 of green.
The structures in the village are stitched with something more like Satin Stitch however they still retain the rustic look of the Straight Stitch and show unevenness in the stitch.
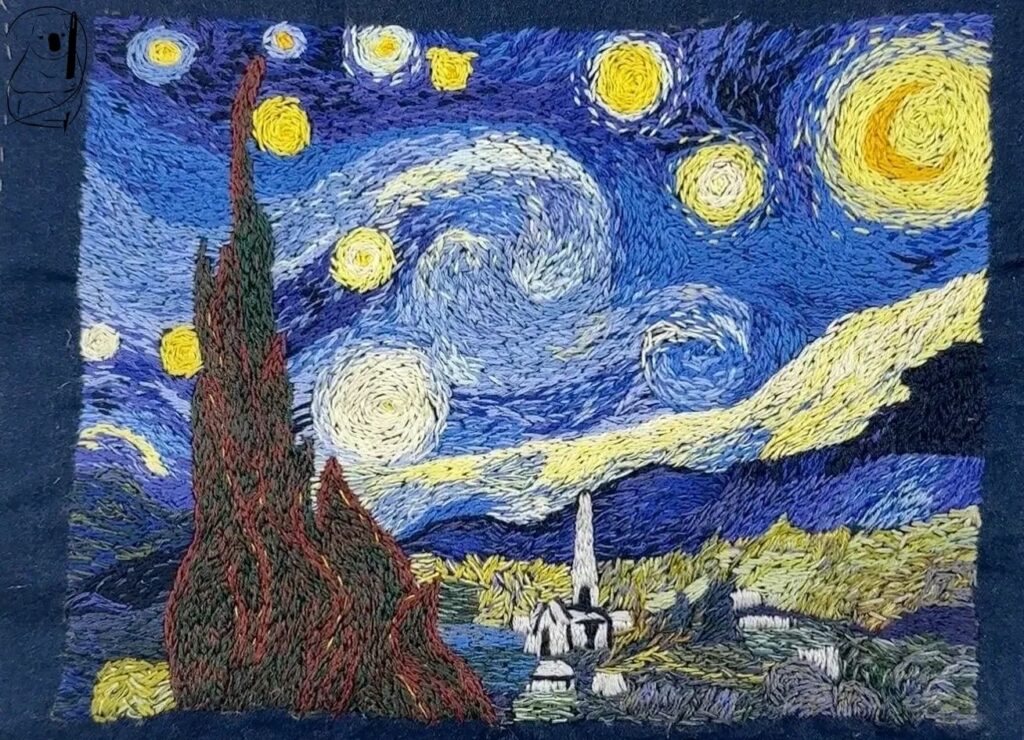
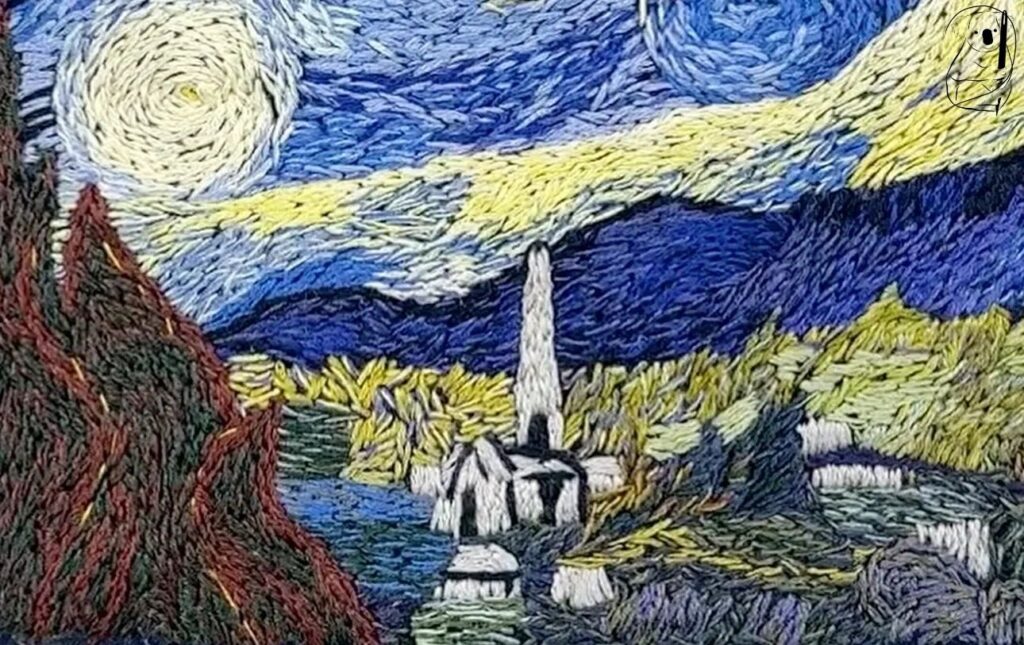
When the stitching is close to being finished, I checked over the project looking for gaps in the stitching and comparing the embroidery to the reference image. In some places more blending is needed or more colour needed to be added.
Satisfied that the image is completed, the Sticky Paper is washed off and the project is ready as a pattern piece for the Vincent Messenger Bag.
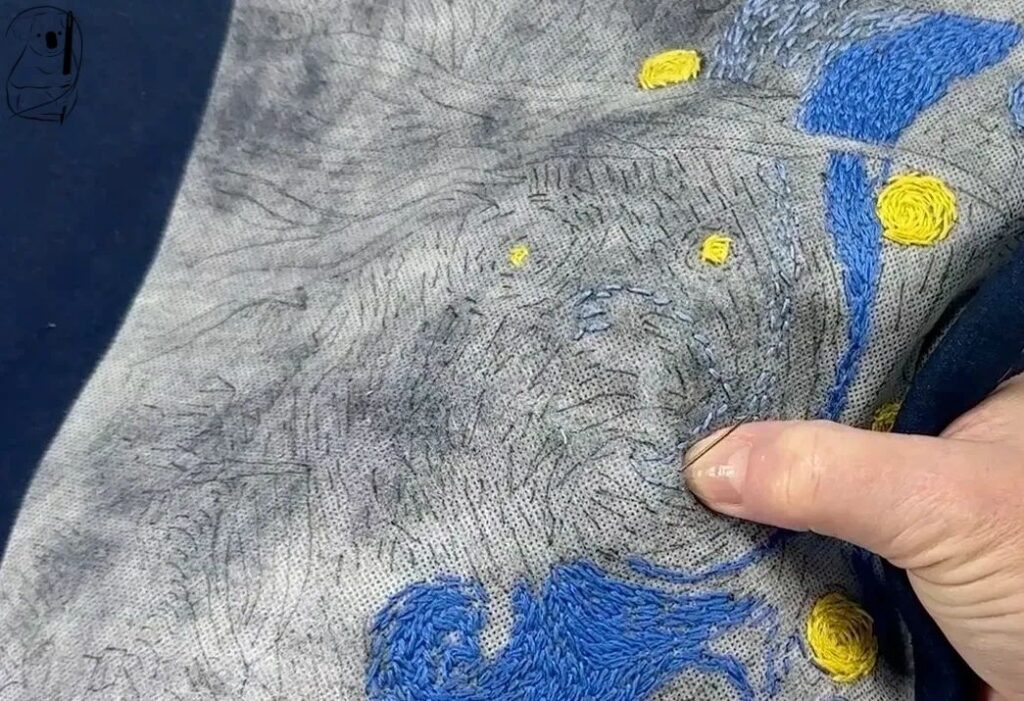
Just a quick note about the Sticky Paper.
This really held up well, however... Sticky in name, Sticky in nature.
Using this product in the Australian summer heat and humidity showed how well it worked in difficult conditions. You can see in the image to the right, there is a dark patch in the top left. This is where the heat and perspiration from my hands has affected the paper. It held up well however the lines become more difficult to see. And the sticky gum seemed to seep through the paper onto my hands. Perhaps the gum worked through the needle holes as well.
The quality of the paper remained. I did occasionally wash my hands to remove the gum and my needle also seemed to collect some gum on it's shaft.
The paper served to strengthen the fabric adding body and firmness to it. I think this was particularly important considering the density of the stitching covering the piece and the layering in some places of different colours and shades of thread.
I still love this product and recommend it.
You can find this product at Amazon here https://amzn.to/4aGXNE7
This blog uses affiliate links for products we have used in this project. If you purchase one of these products we may receive a small commission at no additional cost to you. Our recommendations are based on personal experience and your experience of the products may differ.
See the stitching of The Starry Night in straight stitch
Watch the making of the bag on YouTube
Read about making the messenger bag on our web site