
Welcome to our new series on hand sewing, The Stitch Library. In this series, we will look at hand sewing as complete beginners, providing information about tools and sewing techniques, and learn about stitches that have both decorative and functional uses. As we master each new stitch, we will look at ways to use these stitches to embellish clothes or to simply sew the stitches as part of slow stitching projects. We will demonstrate how the stitches can be used and discuss our design and decision making processes. Our hope is to inspire you to create your own unique items which are beautiful and useful, and reflect your own personality.
As a sister project to this blog, videos will be available on each topic. Click here to see the Stitch Library video #1 – Getting Started in Hand Stitching Our hope is that the blog posts and videos are used together as explore and learn about different aspects of hand stitching and sewing for pleasure.
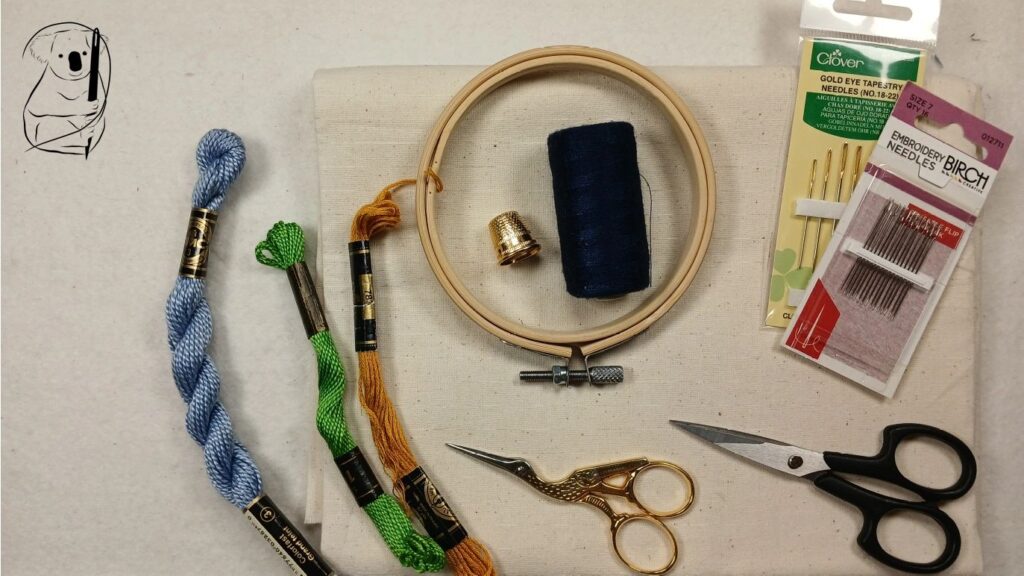
So, what do I need to start hand sewing? Like most crafts, you can get as fancy as you like, but at its most basic, all you need to start sewing is needle, thread, fabric and scissors. Of course the choice of each of these elements will affect the others, so lets have a look at the available options.
Fabric:
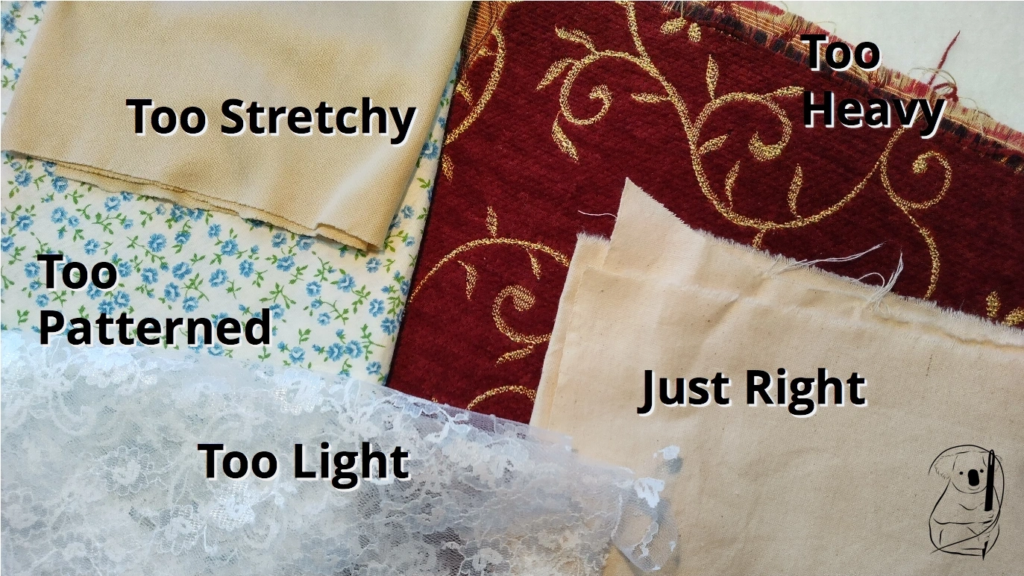
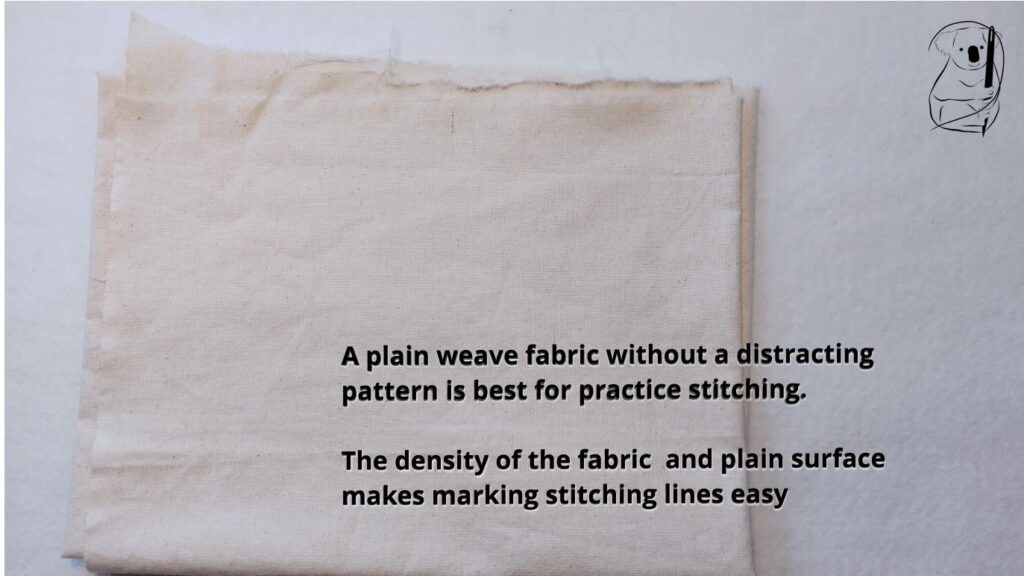
While there are many fabrics to choose from, for the beginner, a plain even-weave fabric is the best for starting and practicing new stitches. A fabric that is too soft will require additional care to not pull too tightly when making your stitches.
Unbleached calico or muslin is 100% cotton, has a close, even weave, is easy to work with, and knots tend to stay on the reverse side of the fabric. It has a density and stiffness that make it easy to stitch on. Also, the plain surface allows for easy marking of stitch lines, so you get the most from your sewing practice. We will use this fabric for many of our stitch library videos.
Needles:
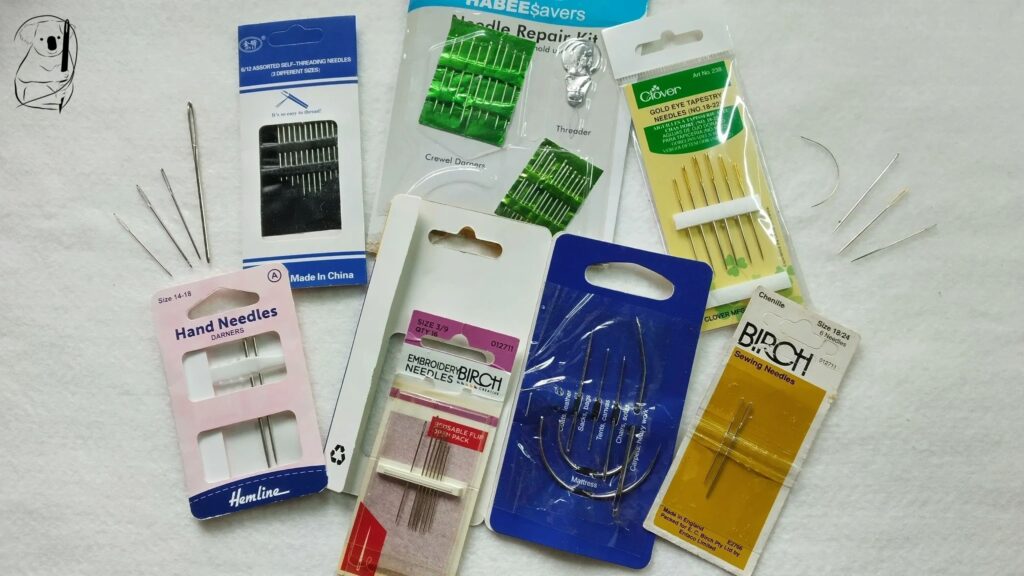
There are many different needles to choose from, and a number of factors will influence the needle you use for each project.
The first consideration is how sharp the needle need to be. For a tightly woven fabric, a sharper needle will work better. For an open weave fabric, a rounder needle tip will push between the weave of the fabric, rather than splitting the fabric's fibres.
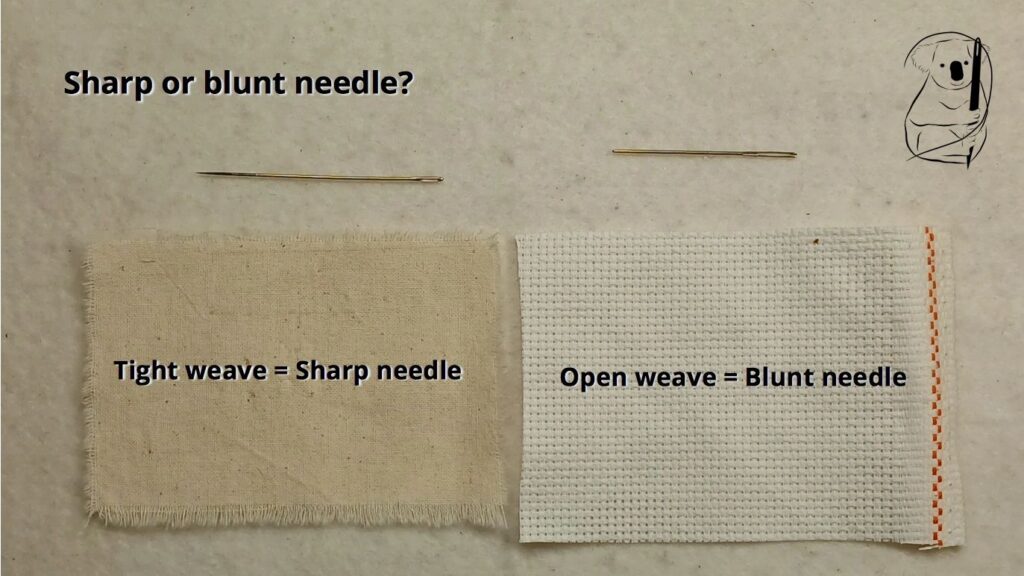
Next, the needle eye needs to be large enough for the thread you are using. The thread must go through the eye of the needle with reasonable ease. Many a needle threader was broken trying to force thread through an eye that was just too small.
The needle must also make a large enough hole in the fabric to comfortably draw the thread through the fabric. Trying to pull needle and thread through a hole that is too small is hard work for your fingers and the additional pressure wears the thread as it tugs on the needle eye and pulls through the fabric.
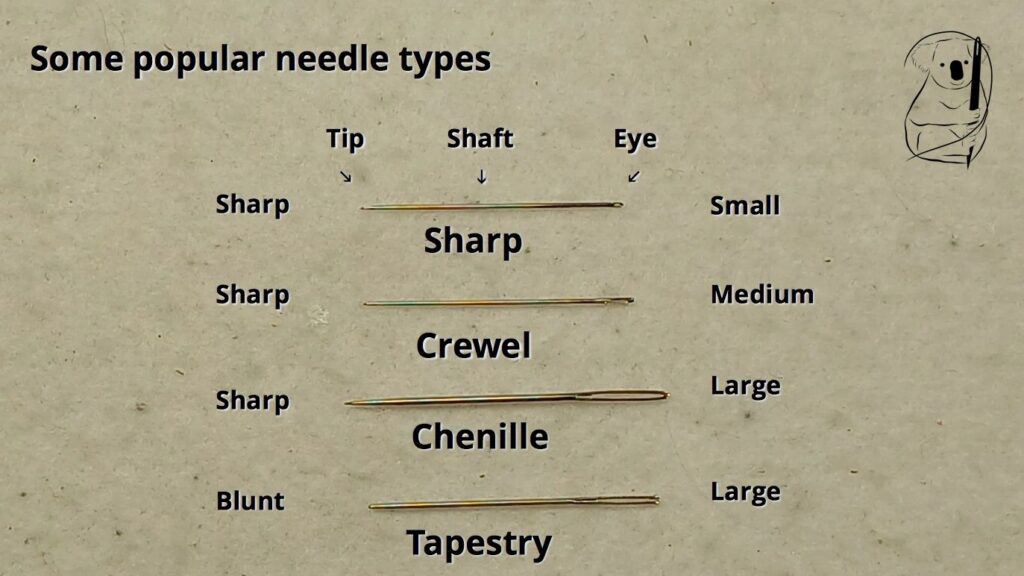
If you have a repair kit like the ones for sewing back on a button, you probably have some sharp sewing needles or sharps. These are general purpose needles and have sharp tips, although the eye tends to be small and may not accommodate multiple strands of embroidery thread.
A Crewel needle is most commonly recommended for embroidery with stranded floss or thread, as it has a sharp tip and a medium sized eye.
If you are working with a thicker thread, a Chenille hand sewing needle has an elongated eye.
Tapestry needles have a larger eye for thicker threads, but a blunt tip for working with open weave fabrics.
Threading the needle
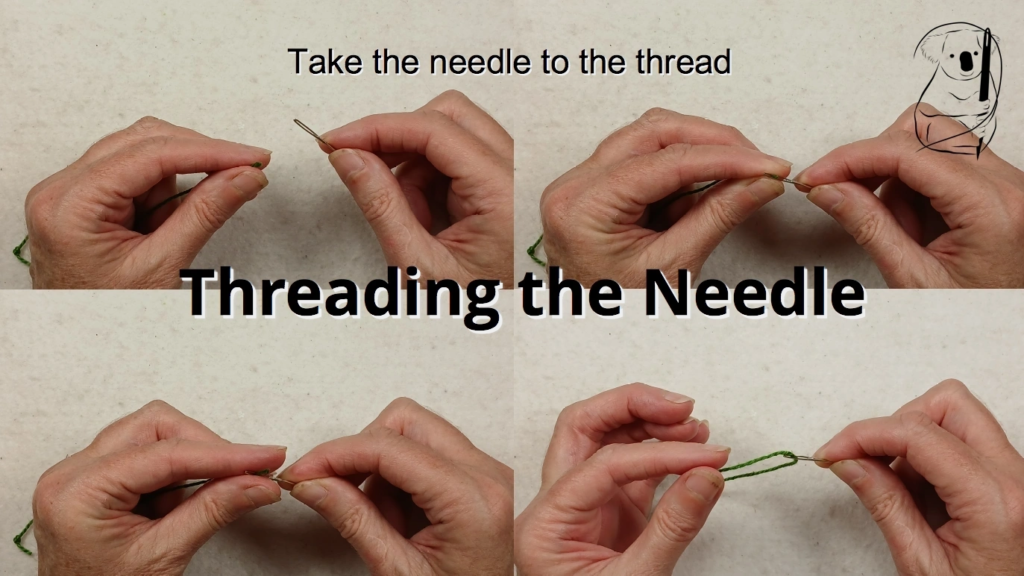
When threading the needle, rather than trying to put the thread through the eye of the needle, try taking the needle to the thread. It can also be helpful to make a loop in the end of the thread, which stabilises the thread even more.
Threads
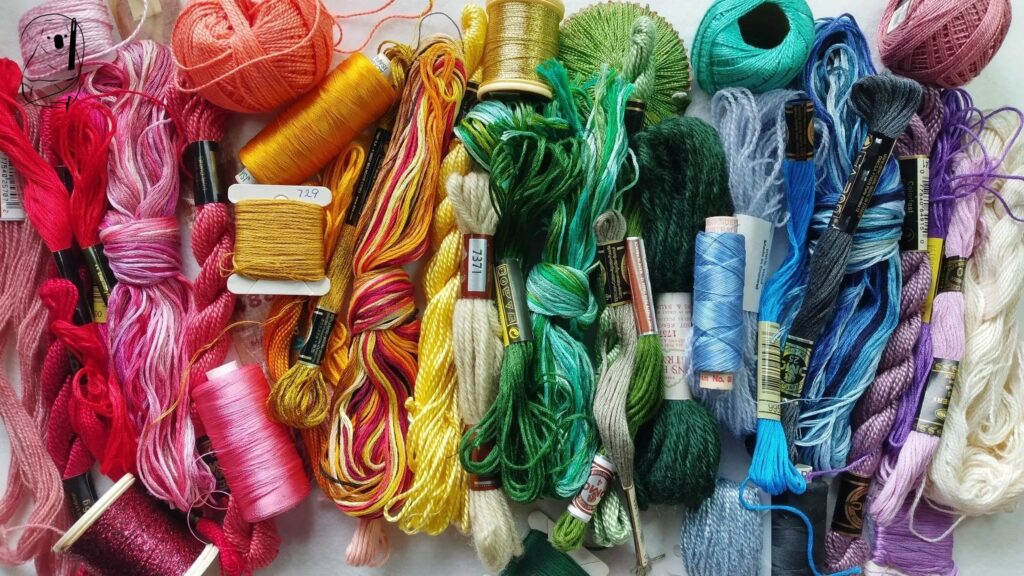
The wonderful world of embroidery threads is a place to lose yourself, there is so much choice. Thread textures come in smooth cotton, fuzzy wool, slinky silk and sparkly metallics. For our stitch tutorials, we will be using a DMC Number 3 Perle thread because it is thick and easy to see. But this might not suit your project when you wish to start sewing.
One of the most popular embroidery threads is the stranded embroidery floss. This is available both branded and unbranded and in all the colours of the rainbow, including variegated threads which change shade or colour along the thread. The stranded embroidery floss comes with six strands of thread, gently gathered together. You can vary the look of your stitches by changing the number of threads you use at once.
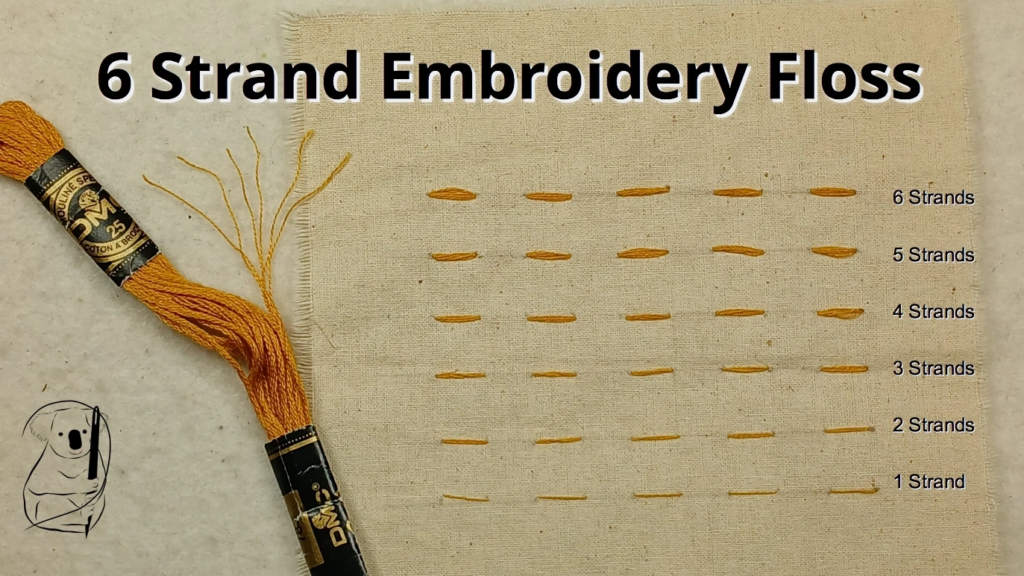
To use stranded floss, the recommended practice is to separate the strands and then recombine them before stitching. To separate the strands, it is best to do this one strand at a time, as trying to do more will often lead to messy knots and wasted thread.
Starting your Sewing
– Is it okay to use knots?
Once you have the equipment together, you need to secure your thread to begin stitching. There has been much discussion over whether you should use knots in your embroidery, and there are many ways of starting and ending your sewing. Once you have some experience you can choose your preferred method. But for now, a knot at the end of the thread just makes the process a little easier when you start.
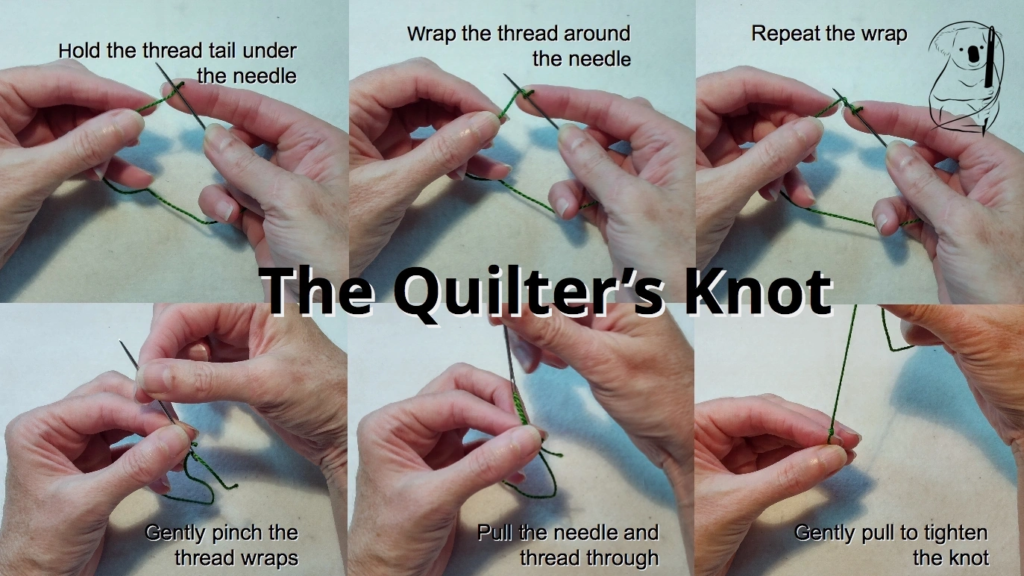
One of my favourite knots is called the Quilter's Knot. Thread your needle, and place the tail of the thread under the tip end of the needle. Wrap the tail of the thread around the needle two or three times. Gently pinch the wraps between finger and thumb, and pull the needle and the thread through the wraps. This knot is demonstrated in our Getting Started in Hand Stitching video.
Keep the wraps firm, but not too tight, so the needle slides through smoothly.
A Perfect Finish
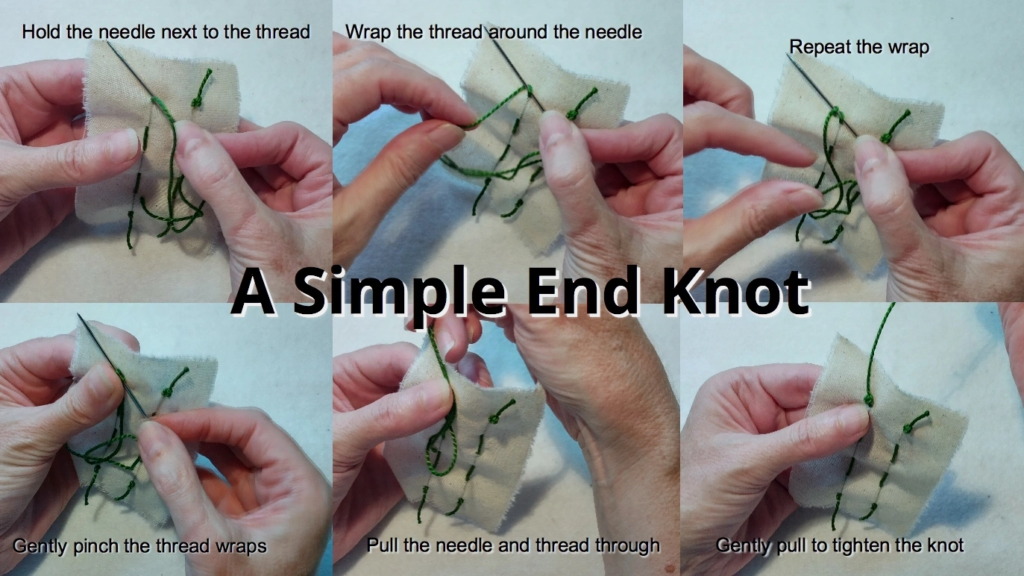
Once you have finished your stitching, you will need to secure the thread. There are many different ways to secure your stitching, which we will look at in the future, but for now, a simple end knot will hold the thread in place. Holding the needle close to the fabric, wrap the thread around the needle two or three times, then hold the wraps in place against the fabric with your finger as you pull the needle and thread through. Trim the thread a short distance from the knot. This knot is demonstrated in our Getting Started video.
Again, keep the wraps firm, but not too tight, so the needle slides through smoothly.
Optional Extras
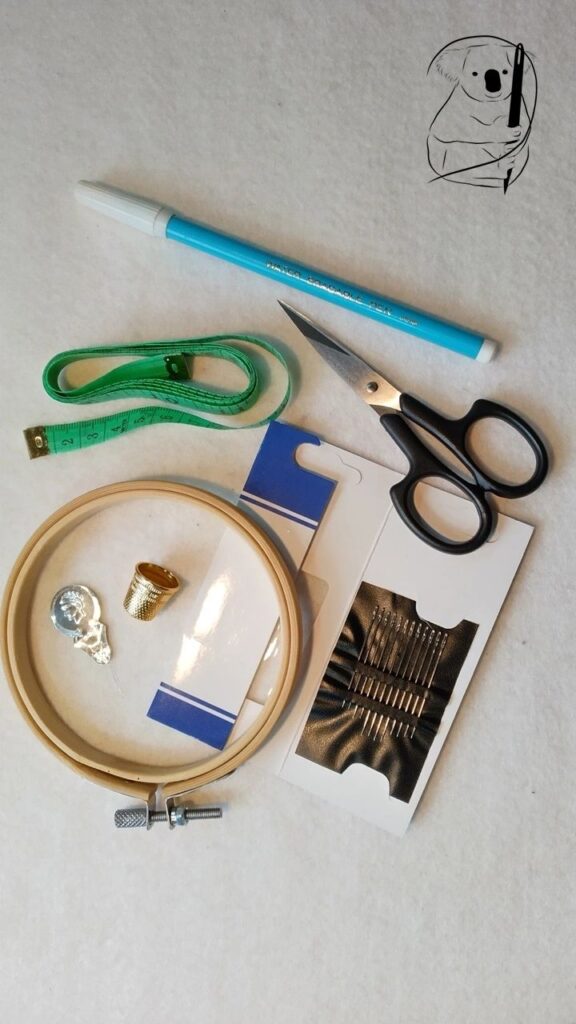
Apart from these elements, there are some other items that might make your sewing experience easier.
When doing decorative hand sewing, an embroidery hoop can help keep the fabric taught, making it easier to keep your stitch tension even.
For those who find threading a needle challenging, assistance comes in the form of needle threaders and self-threading needles. We will test these in a future video.
And if you do a lot of sewing, you might find that protecting your finger becomes a priority. Thimbles come in many shapes and sizes, and can be made from metal, plastic, and leather. The right thimble can make your work faster, and save your skin from punctures, scratches and bruising.
Creating your own Stitch Library
Included with each stitch video will be a free downloadable PDF that you can use to create your own Stitch Library. This sheet has a numbered stitch guide at the top which you can use to mark your practice fabric. The numbers indicate the sequence of sewing, the lines show where the thread appears on the upper surface of your fabric. Find the downloadable stitch guides here.
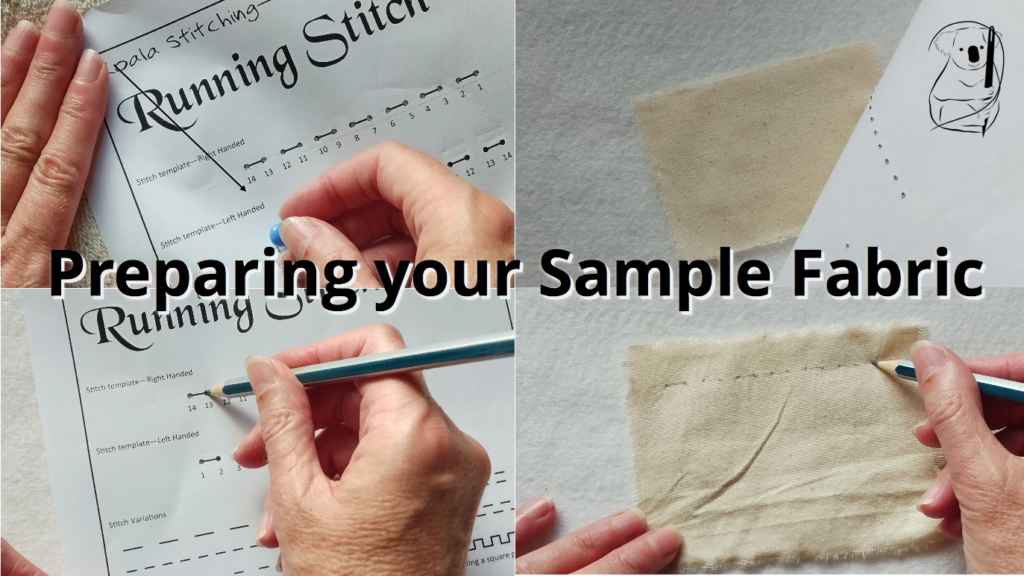
The idea is that you can print the guide, make holes in the paper and use it to mark your practice fabric with a pencil or pen, to assist in learning new stitches. There is also a space at the bottom of the sheet for you to glue your sample. You can then keep the sheets in a folder as a record of your progress, and also a reference to remind you how different stitches are formed.
“But what if I can’t print my Stitch Library stitch guide?” Don’t panic. There are a number of ways around this. Let’s have a look at some of them.
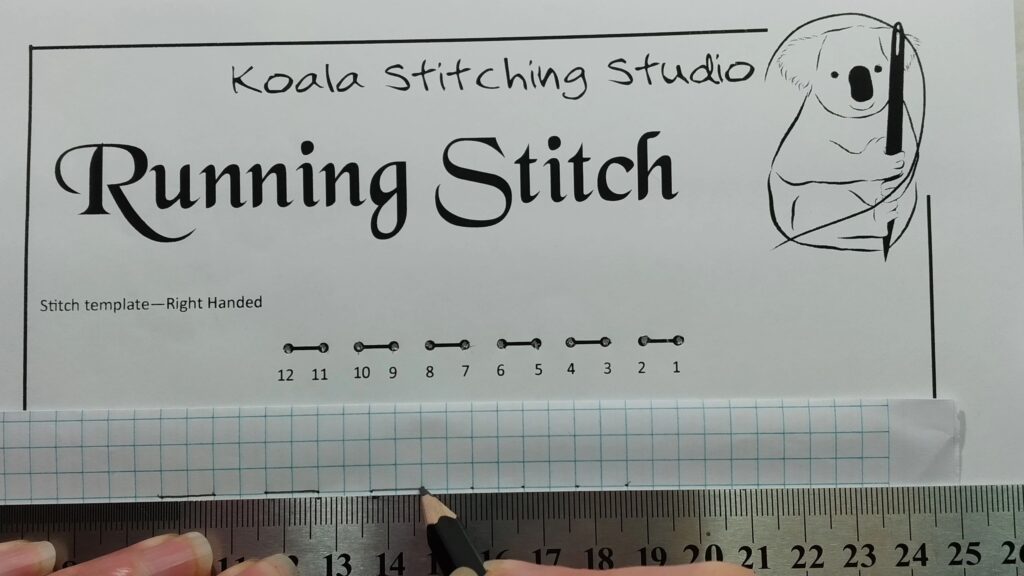
The first issue is that you don’t have a physical guide to help you mark your practice fabric. For a simple stitch like running stitch, you can simply draw a line on the fabric and mark dots evenly along the line to show where each stitch starts and ends. You could also create your own stitch guide, using the PDF on screen as a guide, marking the lines on a piece of paper, putting holes in them and using this to mark your practice fabric. Here, I have used a blank piece of grid paper out of last year’s maths exercise book to draw the lines for the stitches.
The second issue is keeping a record of your sample with the PDF sheet. Using my browser as the PDF viewer on my computer, I am able to add a photo to the PDF and save it for future viewing. So, after you have completed your sample, take a photo of it and save it to the PDF. Then put all your Stitch Library documents together in one folder for future reference.
As we build the Stitch Library, we will have a store of skills and stitches we can return to again and again in our sewing journey. These stitches will be used in upcycling and slow stitching projects as we explore the many different ways we can use stitching and sewing in the world around us.
Find our free downloadable stitch guides on our Resources page.
See the Getting Started in Hand Stitching video on YouTube here.